
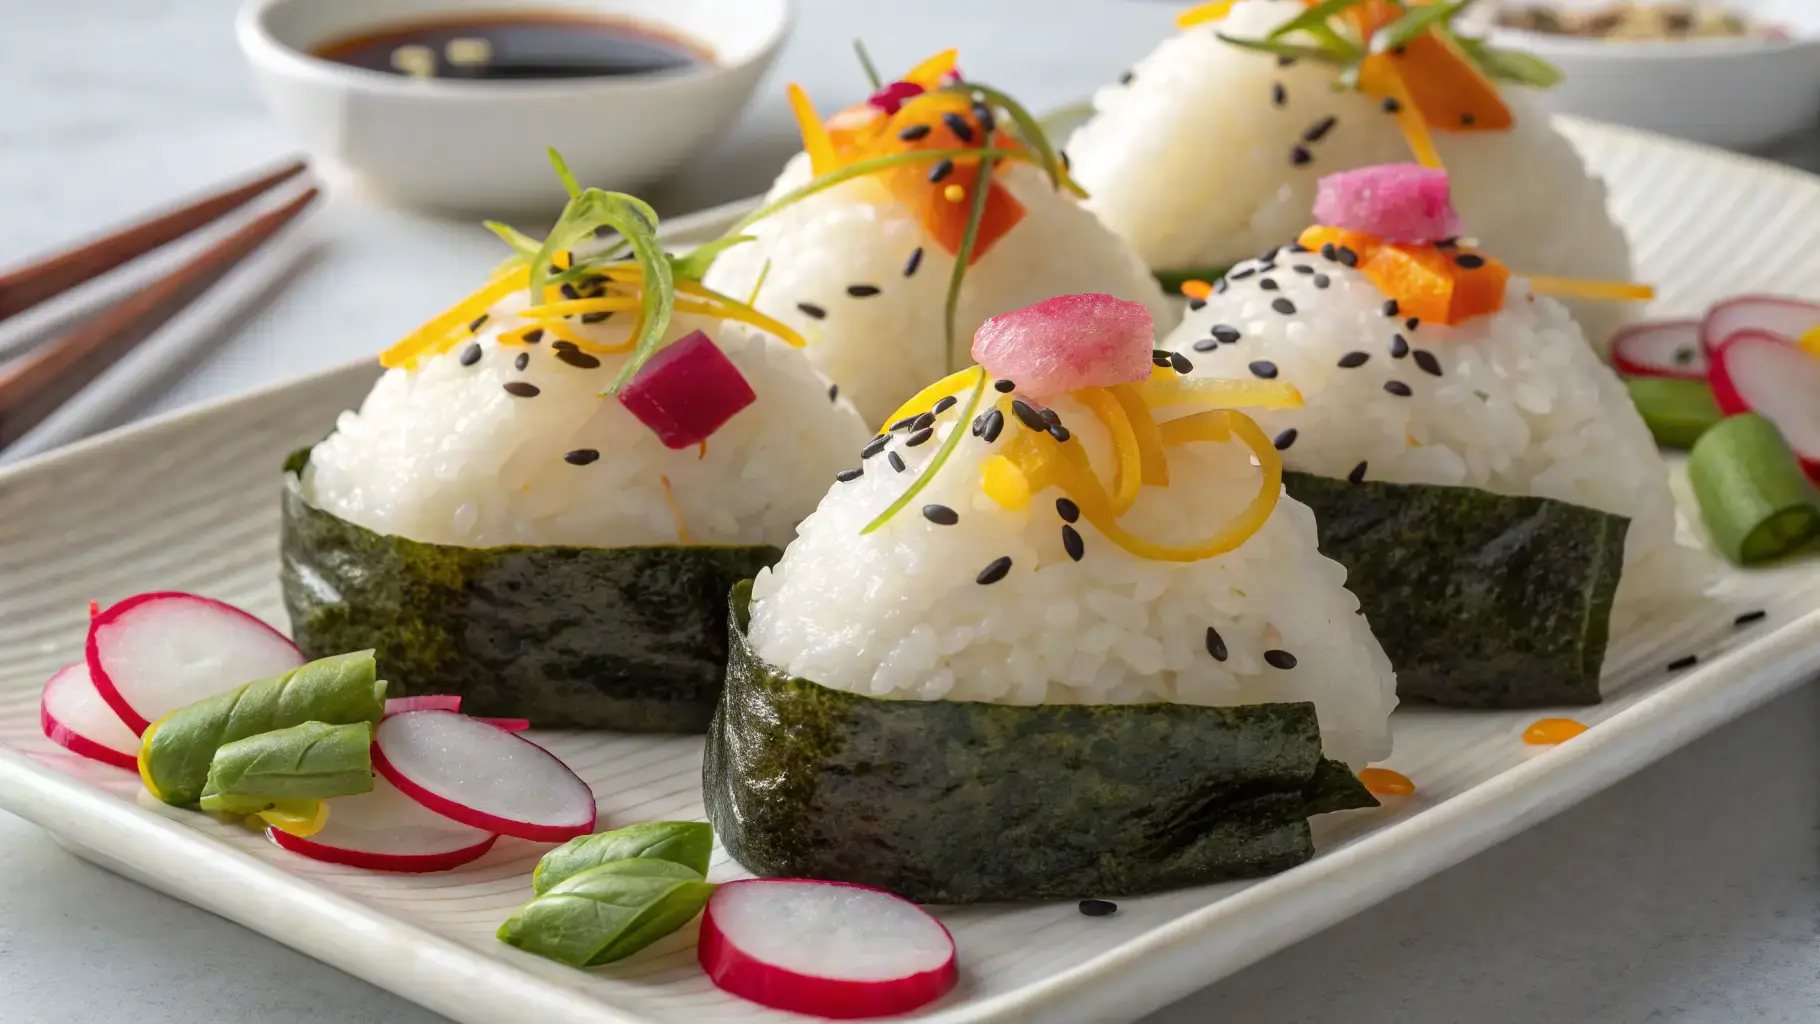
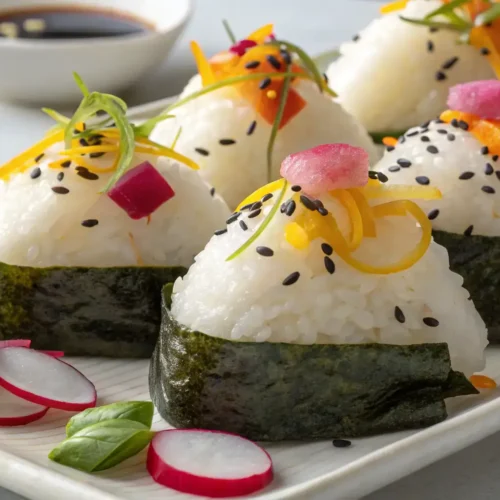
Onigiri Recipe
Onigiri recipe is a delightful journey into the heart of Japanese comfort food! These charming rice balls, often shaped like triangles, are not just a treat for the taste buds but also a feast for the eyes. Imagine fluffy, perfectly seasoned rice wrapped in a delicate layer of nori, filled with savory surprises like tender avocado or zesty pickled vegetables. Each bite is a burst of flavor, making them perfect for lunchboxes, picnics, or a cozy night in. Get ready to roll up your sleeves and create these adorable bites of joy that will warm your heart!
Table of Contents
Table of Contents
Onigiri Recipe
Equipment
- 1 Rice Cooker or Pot For cooking the rice.
- 1 Cutting board For preparing fillings and cutting nori.
- 1 Knife For cutting nori and other ingredients.
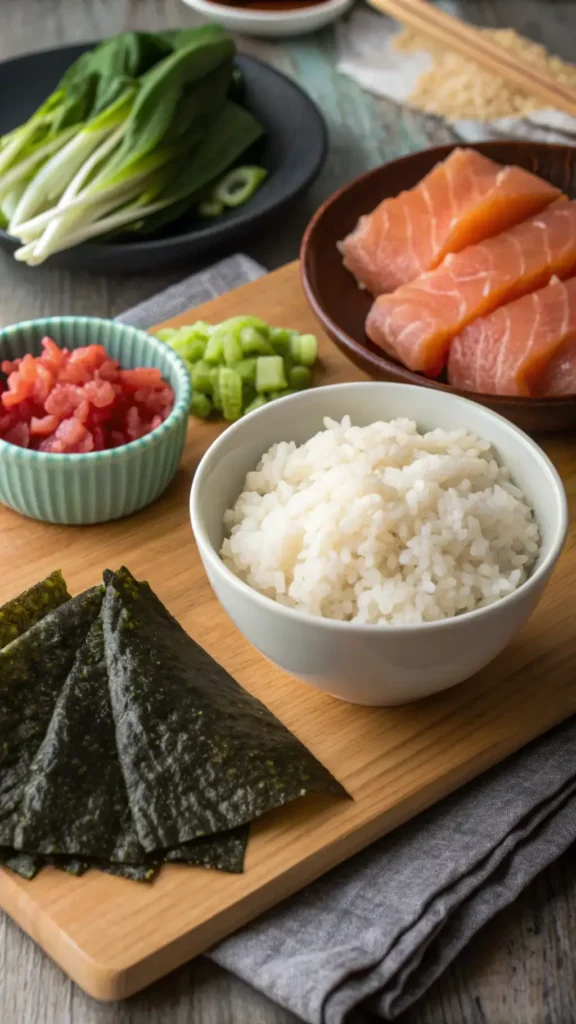
Ingredients
Rice
- 2 cups Short-grain rice Essential for that sticky texture.
- 2.5 cups Water For cooking the rice.
Seasoning
- 1 pinch Salt Enhances flavor.
- 1 splash Rice vinegar For extra flavor.
Fillings
- 1 piece Pickled plum (umeboshi) Traditional filling.
- 1 cup Cooked chicken or tofu Protein filling.
- 1/4 cup Chopped green onions For fresh flavor.
Toppings
- 1 sheet Nori (seaweed) Optional for wrapping.
- 2 tablespoons Sesame seeds Optional topping.
Instructions
Step 1: Cook the Rice
- Rinse 2 cups of short-grain rice under cold water until the water runs clear. Cook the rice in a rice cooker or on the stovetop with 2 1/2 cups of water. Let it steam for 10-15 minutes after cooking.
Step 2: Prepare the Filling
- Choose your favorite filling! Try canned tuna mixed with mayonnaise, or mashed avocado with a sprinkle of salt. You can also use pickled plum (umeboshi) for a traditional touch.
Step 3: Season the Rice
- Once the rice is cooked, let it cool slightly. Mix in a pinch of salt and a splash of rice vinegar for extra flavor.
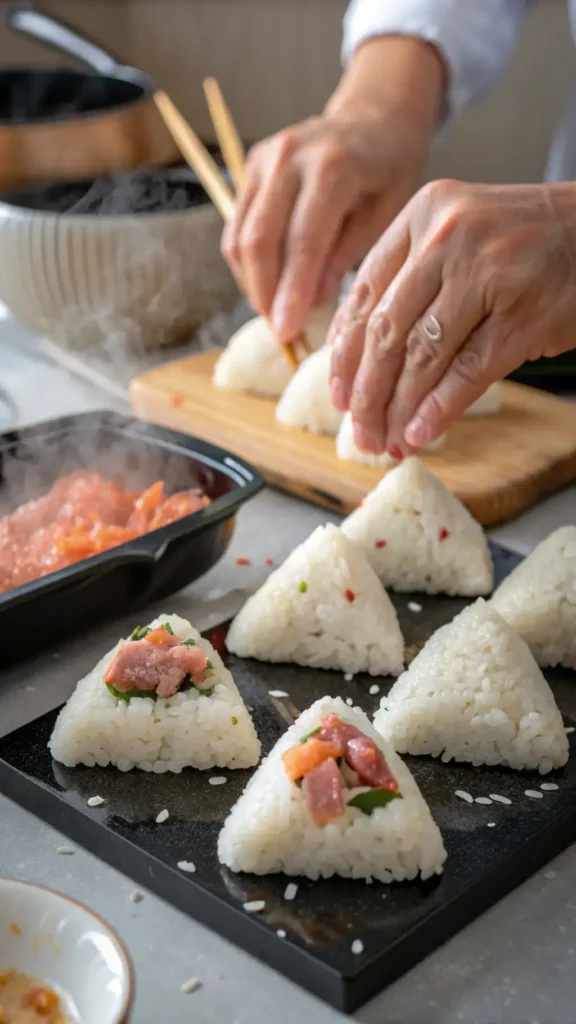
Step 4: Shape the Onigiri
- Wet your hands with water to prevent sticking. Take a handful of rice and flatten it in your palm. Place a spoonful of your chosen filling in the center.
Step 5: Form the Rice Ball
- Carefully fold the rice over the filling and shape it into a triangle or ball. Press gently but firmly to hold it together.
Step 6: Wrap with Nori (Optional)
- If you like, cut nori sheets into strips and wrap them around your onigiri for added flavor and a fun presentation.
Step 7: Enjoy Your Onigiri!
- Your onigiri is ready to be enjoyed! Serve them as a snack, lunch, or picnic treat. Happy eating!
Why You’ll Love This Onigiri Recipe
- It’s a fun and creative way to enjoy rice!
- Customizable fillings let you express your taste.
- Perfect for on-the-go snacks or lunchboxes.
- Simple ingredients make it easy to whip up anytime.
- A delightful blend of flavors in every bite!
Recipe Snapshot
| Feature | Details |
|---|---|
| Category: | Snack |
| Cuisine: | Japanese |
| Prep Time: | 15 minutes |
| Cook Time: | 30 minutes |
| Total Time: | 45 minutes |
| Dietary: | Vegetarian |
| Serves: | 4 |
| Best Served: | Warm or at room temperature |
Ingredients for Onigiri Recipe
- Short-grain rice – Essential for that sticky texture that holds the onigiri together.
- Nori (seaweed) – Adds a delightful umami flavor and helps keep the rice ball intact.
- Salt – Enhances the flavor of the rice and is key for seasoning.
- Sesame seeds – Optional topping for added crunch and nuttiness.
- Pickled plum (umeboshi) – A traditional filling that adds a tangy kick; can be substituted with pickled vegetables.
- Cooked chicken or tofu – Use as a protein filling; tofu is a great vegetarian option.
- Green onions – Chopped for a fresh, zesty flavor in your filling.
Ingredients with measurements will be right under the article in the recipe card.
How to Make the Onigiri Recipe
Get ready to create your own delicious onigiri! Follow these fun steps to make rice balls that are sure to impress.
Step 1: Cook the Rice
Rinse 2 cups of short-grain rice under cold water until the water runs clear. Cook the rice in a rice cooker or on the stovetop with 2 1/2 cups of water. Let it steam for 10-15 minutes after cooking.
Step 2: Prepare the Filling
Choose your favorite filling! Try canned tuna mixed with mayonnaise, or mashed avocado with a sprinkle of salt. You can also use pickled plum (umeboshi) for a traditional touch.
Step 3: Season the Rice
Once the rice is cooked, let it cool slightly. Mix in a pinch of salt and a splash of rice vinegar for extra flavor.
Step 4: Shape the Onigiri
Wet your hands with water to prevent sticking. Take a handful of rice and flatten it in your palm. Place a spoonful of your chosen filling in the center.
Step 5: Form the Rice Ball
Carefully fold the rice over the filling and shape it into a triangle or ball. Press gently but firmly to hold it together.
Step 6: Wrap with Nori (Optional)
If you like, cut nori sheets into strips and wrap them around your onigiri for added flavor and a fun presentation.
Step 7: Enjoy Your Onigiri!
Your onigiri is ready to be enjoyed! Serve them as a snack, lunch, or picnic treat. Happy eating!
Pro Tips for Making the Onigiri Recipe
- Use short-grain rice for the best texture and stickiness.
- Wet your hands with water to prevent the rice from sticking while shaping.
- Experiment with fillings like avocado or pickled vegetables for a twist.
- Wrap in nori just before serving to keep it crispy.
- Store leftovers in an airtight container to maintain freshness.
How to Serve Onigiri Recipe
Here are some fun and creative ways to enjoy your onigiri:
- Pair with a side of miso soup for a comforting meal.
- Serve with pickled vegetables for a tangy crunch.
- Enjoy with a drizzle of soy sauce or tamari for added flavor.
- Wrap in seaweed for a delightful texture contrast.
- Accompany with a fresh salad for a light and healthy option.
- Try with a spicy dipping sauce for an extra kick.
- Pack in a bento box with seasonal fruits for a colorful lunch.
- Serve as a snack with green tea for a traditional touch.
Make Ahead and Storage
Proper storage ensures your onigiri stays delicious for later enjoyment.
Storing Leftovers
- Allow onigiri to cool completely before storing.
- Wrap each rice ball in plastic wrap to prevent drying out.
- Place wrapped onigiri in an airtight container.
- Store in the refrigerator for up to 3 days.
Freezing
- Wrap each onigiri tightly in plastic wrap.
- Place wrapped rice balls in a freezer-safe bag or container.
- Label with the date and freeze for up to 1 month.
Reheating
- Remove onigiri from the freezer and unwrap.
- Microwave on a plate covered with a damp paper towel for 30-60 seconds.
- For best texture, reheat in a skillet over low heat for a few minutes.
For More Recipes, follow me on Facebook and Pinterest
FAQs
What type of rice is best for making onigiri?
Short-grain Japanese rice, like sushi rice, is ideal for onigiri. It has the right stickiness to hold the shape well. If you can’t find sushi rice, you can use any short-grain rice as a substitute, but avoid long-grain varieties.
Can I make onigiri ahead of time?
Yes, you can prepare onigiri in advance! Just keep them wrapped in plastic wrap and store them in the refrigerator. To maintain freshness, consume them within a day or two. You can also reheat them slightly in the microwave.
What fillings can I use for onigiri?
Onigiri can be filled with a variety of ingredients! Popular options include pickled plum (umeboshi), grilled salmon, or seasoned vegetables. For a vegetarian option, try using avocado or tofu. Get creative with your favorite flavors!
How do I shape onigiri properly?
To shape onigiri, wet your hands with water to prevent sticking. Take a small amount of rice, flatten it slightly, add your filling, and mold it into a triangle or ball shape. Press gently but firmly to ensure it holds together.