
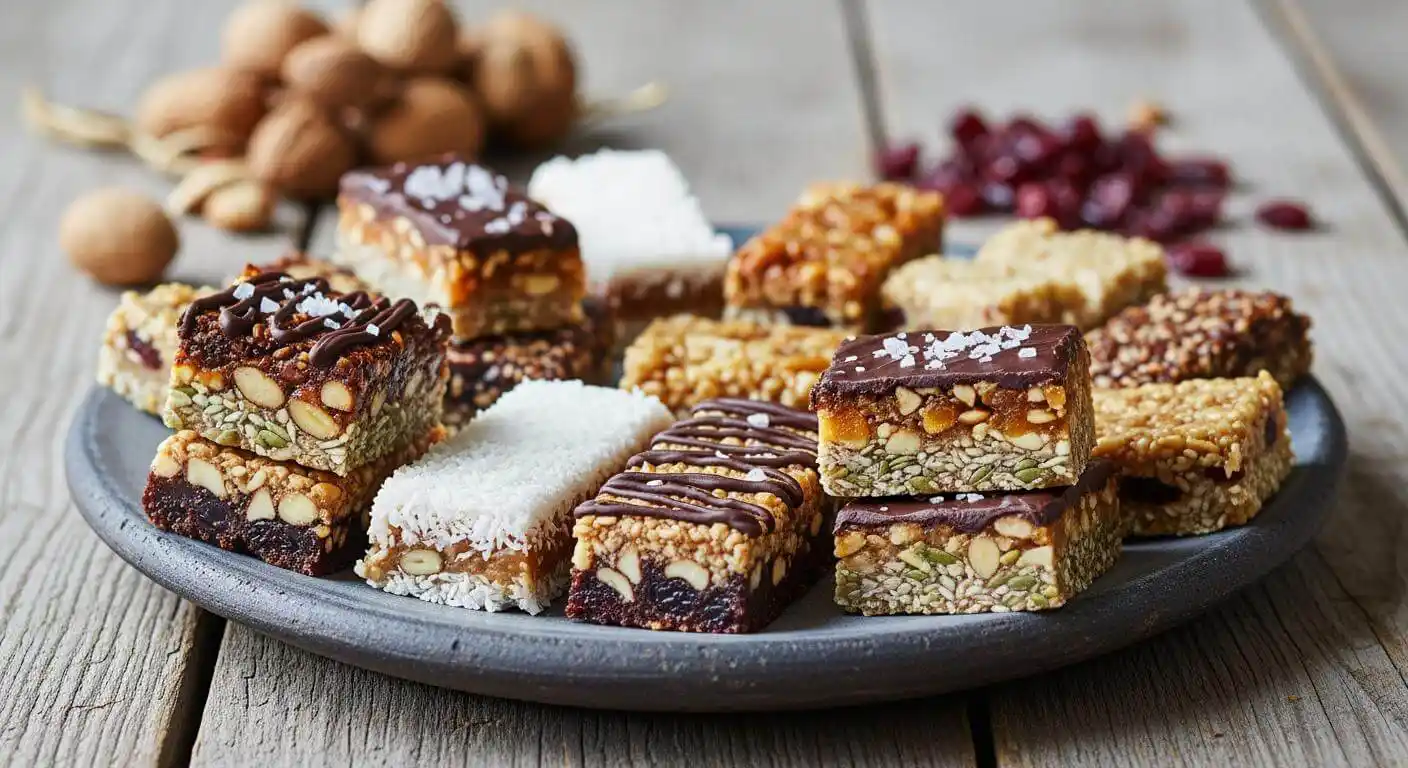
Are you ready to treat yourself to a snack that is both satisfying and nutritious? Naked Bars are the perfect solution! These delightful bars are not only packed with wholesome ingredients, but they also provide a deliciously chewy texture that will keep you coming back for more. With a combination of oats, nut butter, and dried fruits, they deliver a burst of flavor in every bite. Moreover, they are incredibly versatile, allowing you to customize them to suit your taste preferences. Whether you need a quick energy boost before a workout or a wholesome snack during your busy day, Naked Bars have got you covered. So, let’s dive into this easy recipe and discover how to create these mouthwatering bars that are sure to impress!
Table of Contents
Table of Contents
Naked Bars
Equipment
- 1 9×9-inch baking dish Lined with parchment paper for easy removal.
- 1 Mixing Bowl For combining ingredients.
- 1 Spatula For pressing the mixture into the baking dish.
Ingredients
Base Ingredients
- 2 cups Rolled oats Provides a hearty base and is rich in fiber.
- 1 cup Nut butter (almond or cashew) Choose for creamy texture and healthy fats.
Sweetener
- 1/2 cup Honey, maple syrup, or agave nectar Adds natural sweetness.
- 1/4 cup Chia or flaxseeds Enhances nutritional value and adds crunch.
Add-ins
- 1 cup Dried fruits (raisins, cranberries, or apricots) Adds natural sweetness and chewiness.
- 1/2 cup Chocolate chips (dark or carob) Adds a hint of indulgence.
Instructions
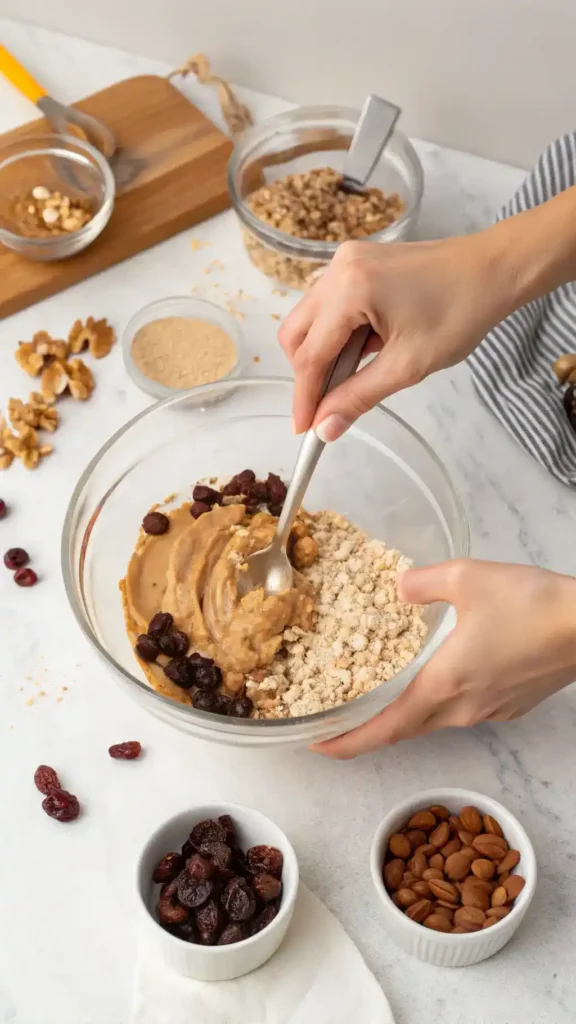
Combine Ingredients
- In a large mixing bowl, add rolled oats, nut butter, sweetener, chia or flaxseeds, and dried fruits. Stir until well combined.
Press Mixture
- Transfer the mixture to a lined baking dish and press firmly into an even layer.
Chill
- Cover with plastic wrap and refrigerate for at least 2 hours to set.
Cut and Serve
- Remove from the refrigerator, lift out using parchment paper, and cut into squares or rectangles.
Notes
| Calories | Fat | Protein | Carbs |
|---|---|---|---|
| 200 | 10g | 5g | 25g |
Key Benefits of Naked Bars
Naked Bars are not just a tasty treat; they come with a plethora of benefits that make them a smart choice for anyone looking to snack healthily. Here are the top reasons to love these delicious bars:
- Nutrient-Dense: Naked Bars are packed with wholesome ingredients, providing essential vitamins and minerals that your body craves. This means you’re fueling your body with goodness!
- Energy Boost: Perfect for a quick snack or pre-workout boost, these bars deliver sustained energy without a sugar crash. You’ll feel energized and ready to tackle your day!
- Versatile: Suitable for various dietary preferences, including vegan and gluten-free options, Naked Bars can cater to everyone. This versatility makes them a go-to snack for all occasions.
- Convenience: Easy to prepare and store, Naked Bars are ideal for on-the-go lifestyles. Just grab one, and you’re set for a busy day ahead!
- Satiating: High in fiber and protein, they keep you feeling full longer. This means fewer cravings and more satisfaction between meals.
In summary, Naked Bars are a fantastic choice for anyone looking to enjoy a nutritious and delicious snack. With their numerous benefits, you can feel good about reaching for one whenever hunger strikes!
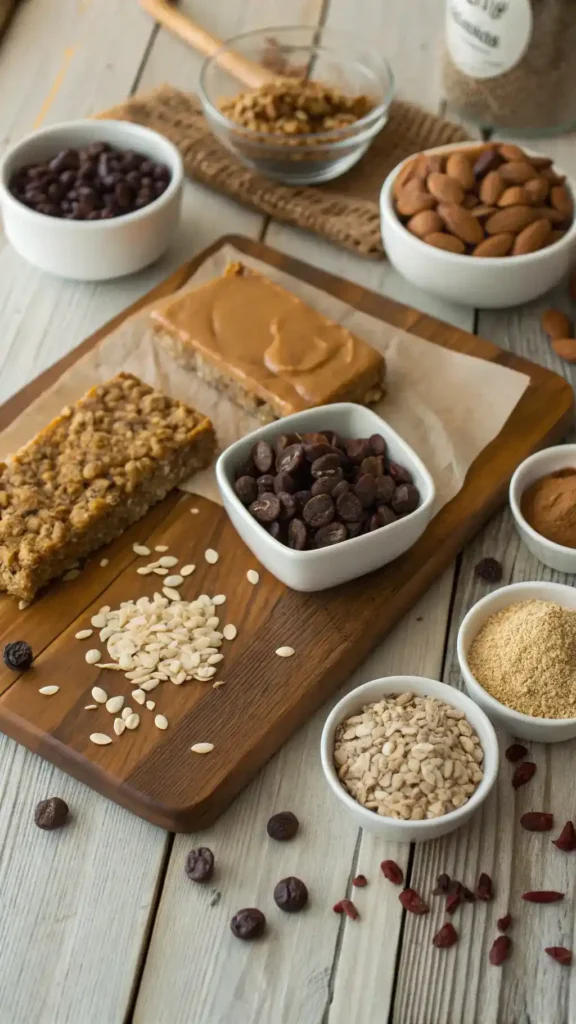
Ingredients for Naked Bars
Get ready to whip up some delicious Naked Bars! These tasty treats are not only easy to make but also packed with wholesome goodness. Here’s what you’ll need:
- Oats: Rolled oats are the star of the show! They provide a hearty base and are rich in fiber, keeping you full and satisfied.
- Nut Butter: Choose almond or cashew butter for a creamy texture and healthy fats. If you’re nut-free, sunflower seed butter is a fantastic alternative!
- Sweetener: Add a touch of natural sweetness with honey, maple syrup, or agave nectar. Each option brings its own unique flavor profile!
- Seeds: Chia or flaxseeds are not just for smoothies! They enhance the nutritional value and add a delightful crunch.
- Dried Fruits: Toss in some raisins, cranberries, or apricots for a burst of natural sweetness and chewiness. They make every bite a little more exciting!
- Chocolate Chips: Dark chocolate or carob chips are the perfect finishing touch. They add a hint of indulgence that you won’t want to miss!
With these ingredients, you’re well on your way to creating your very own Naked Bars. Not only are they nutrient-dense, but they also provide an energy boost that’s perfect for any time of day. So, gather your ingredients and let’s get started on this delicious adventure!
How to Make Naked Bars
Creating your own Naked Bars is not only simple but also incredibly rewarding. Follow these detailed steps to ensure your bars turn out perfectly every time.
- Combine Ingredients: In a large mixing bowl, start by adding 2 cups of rolled oats. These oats serve as the hearty base for your Naked Bars, providing essential fiber. Next, add 1 cup of nut butter—almond or cashew butter works beautifully. If you need a nut-free option, sunflower seed butter is an excellent substitute. Then, pour in 1/2 cup of your chosen sweetener, such as honey, maple syrup, or agave nectar. This will add a natural sweetness to your bars. Finally, mix in 1/4 cup of chia or flaxseeds, along with 1 cup of dried fruits like raisins or cranberries. Stir everything together until well combined, ensuring that all ingredients are evenly distributed.
- Press Mixture: Once your mixture is thoroughly combined, transfer it to a lined 9×9-inch baking dish. Use a spatula or your hands to press the mixture firmly into the dish. This step is crucial, as it helps the bars hold together once they are set. Make sure to create an even layer, as this will ensure uniformity in size and texture.
- Chill: After pressing the mixture, cover the dish with plastic wrap and refrigerate it for at least 2 hours. Chilling allows the bars to set properly, making them easier to cut later. During this time, the flavors will meld together, enhancing the overall taste.
- Cut and Serve: Once the bars have chilled and firmed up, remove them from the refrigerator. Lift the mixture out of the baking dish using the edges of the parchment paper. Place it on a cutting board and cut it into squares or rectangles, depending on your preferred size. Enjoy your Naked Bars immediately, or store them for later!
By following these steps, you’ll create delicious Naked Bars that are not only nutrient-dense but also perfect for a quick snack or energy boost. Enjoy the satisfaction of making your own healthy treats!
Pro Tips, Variations, and Common Problems
Making Naked Bars can be a delightful experience, but sometimes you might encounter a few hiccups. Here are some pro tips and variations to help you create the perfect bars every time.
Pro Tips
– Texture Matters: For chewier Naked Bars, consider using more nut butter or adding extra dried fruits. This will enhance the overall mouthfeel and keep them satisfying.
– Binding Issues: If your mixture feels too crumbly, don’t worry! Simply add a bit more nut butter or sweetener to help bind everything together. This adjustment can make a significant difference.
– Press Firmly: When transferring the mixture to your baking dish, press it down firmly. This step is crucial for ensuring your bars hold together well once cut.
Creative Variations
– Nut-Free Option: If you need a nut-free version, swap out nut butter for sunflower seed butter or tahini. This change keeps the bars delicious while accommodating dietary restrictions.
– Flavor Boost: Experiment with different nuts, seeds, or spices like cinnamon or vanilla extract. These additions can elevate the flavor profile of your Naked Bars.
– Chocolate Lovers: For a decadent twist, mix in dark chocolate or carob chips. This variation adds a rich, indulgent touch that chocolate lovers will appreciate.
Common Problems
– Too Dry: If your bars turn out too dry, it might be due to overbaking or not enough moisture in the mixture. To fix this, try adding a splash of water or more sweetener next time.
– Sticking to the Pan: To prevent sticking, line your baking dish with parchment paper. This simple step makes it easier to lift the bars out once they’re set.
– Storage Issues: Ensure your Naked Bars are tightly wrapped or stored in an airtight container. This practice will help maintain their freshness and prevent them from drying out.
By following these tips and variations, you can create Naked Bars that are not only delicious but also tailored to your preferences. Enjoy the process and happy snacking!
Serving Suggestions for Naked Bars
When it comes to enjoying Naked Bars, the possibilities are as endless as your creativity! These nutrient-dense snacks are not only delicious but also versatile, making them perfect for various occasions. Here are some unique serving ideas that will surely impress your guests and elevate your snacking experience:
Snack Time Delight
Enjoy Naked Bars as a mid-afternoon pick-me-up. Pair them with a cup of herbal tea or a refreshing smoothie for a delightful snack break. Additionally, you can cut them into bite-sized pieces and serve them on a platter for a fun, shareable treat.
Breakfast Boost
Transform your morning routine by crumbling Naked Bars over a bowl of yogurt. Add fresh fruits like berries or banana slices for a balanced breakfast that’s both satisfying and energizing. Furthermore, you can drizzle a bit of honey or maple syrup on top for an extra touch of sweetness.
On-the-Go Energy
Naked Bars are perfect for busy lifestyles! Pack them in your bag for road trips, hikes, or even a long day at the office. They provide a quick energy boost without the sugar crash, making them an ideal companion for any adventure. Moreover, consider wrapping them in colorful parchment paper for a fun, personalized touch.
Creative Pairings
For an indulgent treat, serve Naked Bars alongside a scoop of your favorite ice cream or dairy-free alternative. This combination creates a delightful contrast of textures and flavors. Additionally, you can sprinkle some nuts or seeds on top for added crunch and nutrition.
Festive Touch
During gatherings or celebrations, cut Naked Bars into festive shapes using cookie cutters. Arrange them on a decorative platter and garnish with fresh mint leaves or edible flowers. This simple presentation will not only look stunning but also entice your guests to indulge in these wholesome treats.
In conclusion, Naked Bars are not just a snack; they are a canvas for your culinary creativity. Whether you enjoy them solo or as part of a more elaborate spread, these bars are sure to satisfy your cravings while keeping things healthy and delicious. So, go ahead and explore these serving suggestions to make your Naked Bars shine!
How to Properly Store and Reheat Naked Bars
To enjoy your Naked Bars at their best, proper storage and reheating techniques are essential. By following these simple guidelines, you can maintain their delightful flavor, texture, and quality, ensuring that each bite is as satisfying as the first.
Storage Tips
Firstly, to keep your Naked Bars fresh, store them in an airtight container. This method helps to prevent moisture and air from compromising their texture. If you plan to enjoy them within a week, simply place the container in the refrigerator. However, if you want to extend their shelf life, consider freezing them. Wrap each bar individually in plastic wrap or parchment paper, and then place them in a freezer-safe bag. This way, they can last up to three months in the freezer. Additionally, always label your containers with the date to keep track of freshness.
Moreover, it’s crucial to practice food safety. Ensure that your hands and any utensils used are clean to prevent bacterial growth. If you notice any signs of spoilage, such as an off smell or unusual texture, it’s best to discard the bars. By taking these precautions, you can enjoy your Naked Bars worry-free.
Reheating Methods
When it comes to reheating Naked Bars, the goal is to preserve their delightful taste and texture. One effective method is using the microwave. Simply place a bar on a microwave-safe plate and cover it with a damp paper towel. Heat it on low for about 10-15 seconds. This technique adds moisture back into the bar, keeping it soft and chewy.
If you prefer a crispy exterior, the oven is an excellent choice. Preheat your oven to 350°F (175°C). Place the bars on a baking sheet lined with parchment paper and heat for about 5-7 minutes. This method rejuvenates the bars while giving them a delightful crunch. Alternatively, you can use an air fryer. Set it to 300°F (150°C) and heat the bars for about 3-5 minutes, checking frequently to avoid overcooking.
In summary, whether you choose to microwave, bake, or air fry, always aim for low temperatures and short intervals. This way, you can enjoy your Naked Bars just as if they were freshly made, retaining their deliciousness and satisfying texture.
Conclusion
As we wrap up our journey with these delightful Naked Bars, remember that simplicity and versatility are at the heart of this recipe. With just a handful of wholesome ingredients, you can create a nutrient-dense snack that not only satisfies your cravings but also fuels your day. So, whether you’re looking for a quick energy boost or a healthy treat to enjoy with friends, these bars are an excellent choice. I encourage you to roll up your sleeves and give this recipe a try; the process is just as enjoyable as the end result!
Share Your Experience
I would love to hear how your Naked Bars turn out! Feel free to share your results or ask any questions you may have. Additionally, don’t hesitate to experiment with different variations or pairings to make these bars your own. Cooking is all about creativity and fun, and Naked Bars provide the perfect canvas for your culinary imagination. So, get in the kitchen, have fun, and enjoy every delicious bite!
FAQs about Naked Bars
Here are some common questions about Naked Bars, along with helpful answers to enhance your baking experience!
Can I make Naked Bars nut-free?
Yes, you can easily make Naked Bars nut-free! Simply substitute nut butter with sunflower seed butter or tahini for a delicious alternative.
How long do Naked Bars last?
Naked Bars can be stored in the refrigerator for up to a week. If you want to keep them longer, wrap them individually and freeze for up to three months.
Can I add protein powder?
Absolutely! Adding protein powder is a great way to enhance the nutritional profile of your Naked Bars. Just mix it in with the other ingredients for a protein boost.
What can I use instead of honey?
If you prefer not to use honey, maple syrup or agave nectar are excellent alternatives that will still provide natural sweetness.
Are Naked Bars suitable for kids?
Yes, Naked Bars make a healthy snack option for children. They provide energy and essential nutrients, making them a great choice for kids!