
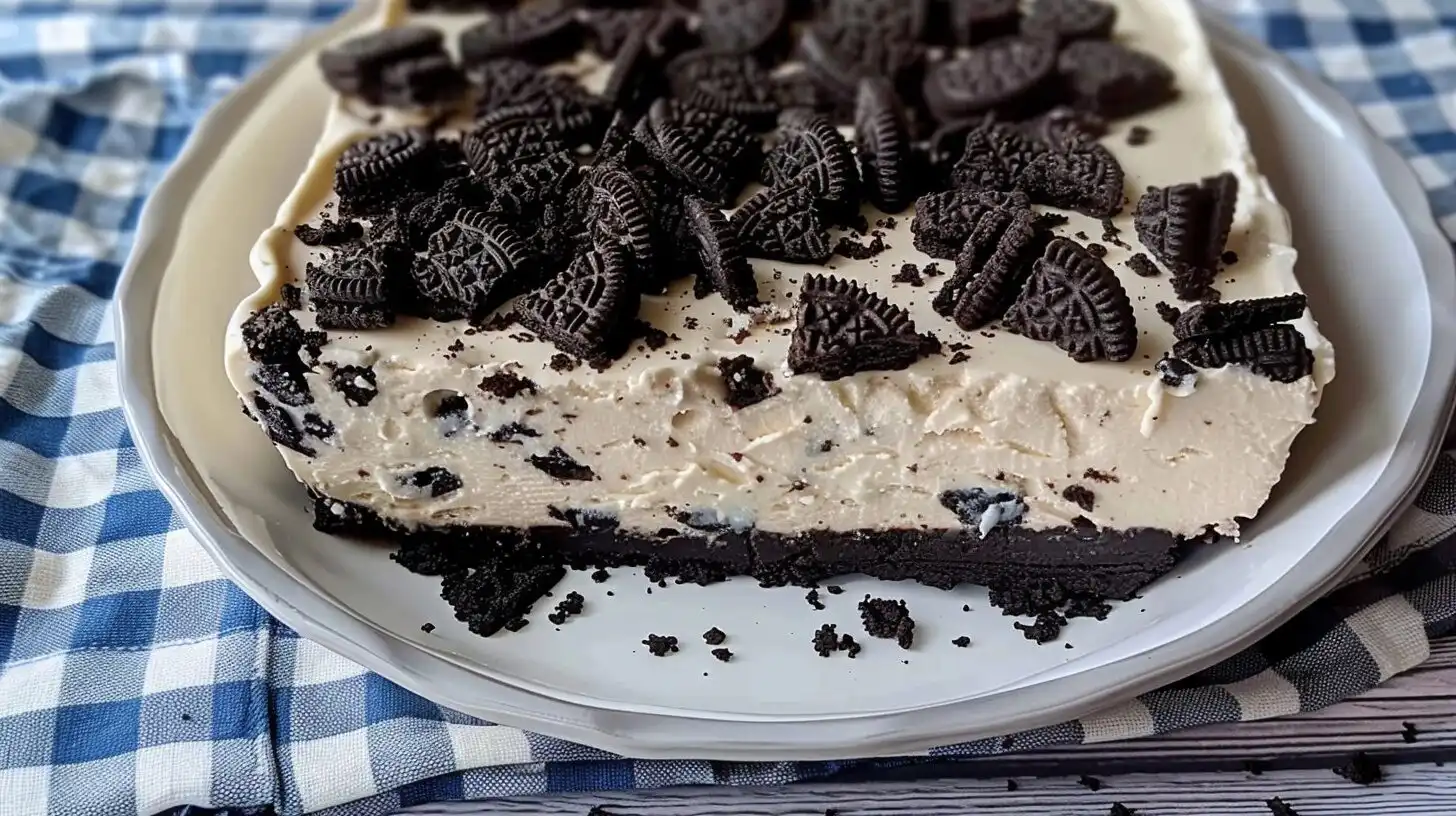
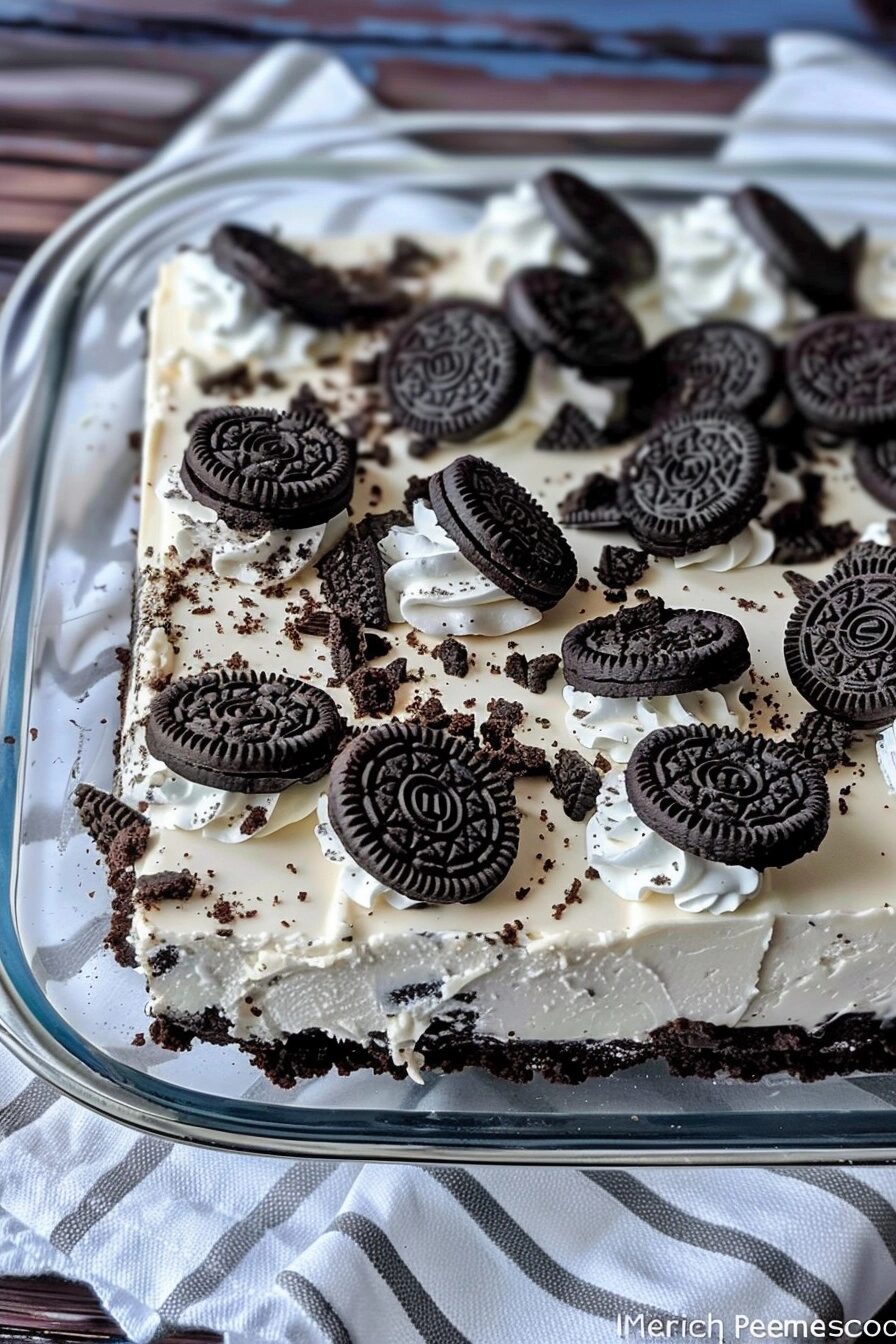
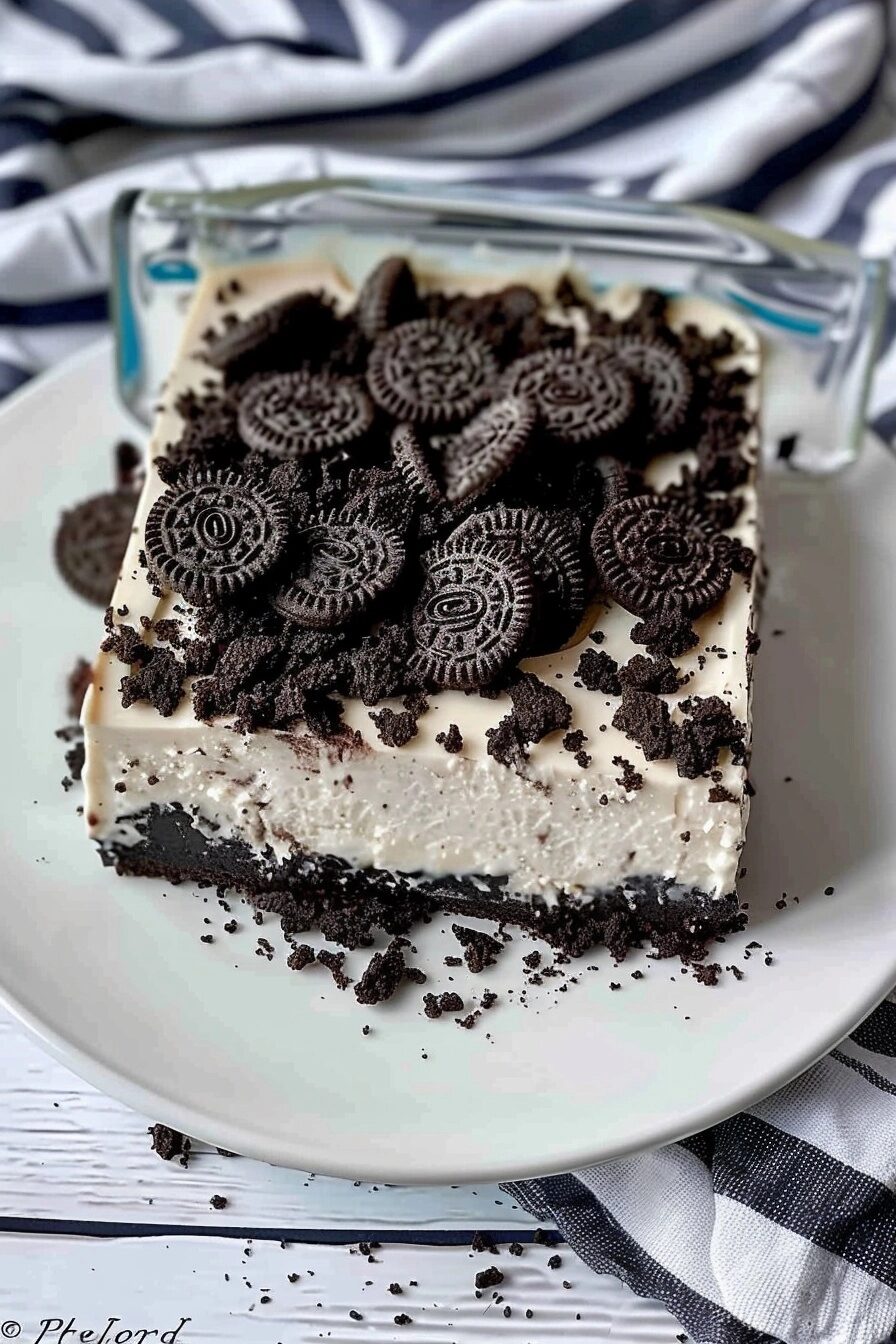
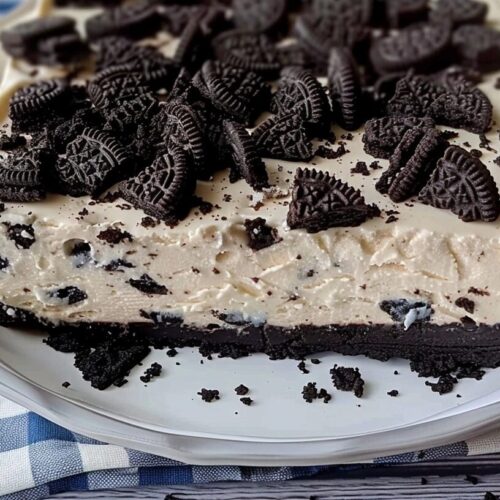
Gluten free no bake Oreo cheesecake is a decadent dessert that combines a crunchy chocolate crust with a silky, velvet-smooth cream cheese filling. This simple treat relies on chilled perfection rather than an oven, making it the ideal choice for warm days or stress-free entertaining when you want a professional-looking dessert without the technical fuss.
Table of Contents
Table of Contents
Why You’ll Love This Gluten Free No Bake Oreo Cheesecake
The first thing you will notice is the perfect balance of flavors. The slight bitterness of the gluten-free chocolate cookies cuts through the rich, tangy sweetness of the cream cheese, creating a bite that is sophisticated yet deeply nostalgic.
Texture is where this dessert truly shines. Because it is a no-bake recipe, the filling maintains a light, airy structure that melts on the tongue, while the crust provides a satisfying contrast that stays crisp and firm throughout the chilling process.
Convenience is the ultimate benefit here. You can prepare this hours in advance, allowing you to focus on your guests while the freezer works its magic. It is an incredibly reliable dish that looks stunning when sliced, especially when finished with a few extra cookie crumbles on top.
Ingredients of the Gluten Free No Bake Oreo Cheesecake
For the Crust
- 20 gluten-free chocolate sandwich cookies, crushed into fine crumbs
- 4 tablespoons unsalted butter, melted
For the Cheesecake Filling
- 16 ounces cream cheese, softened to room temperature
- 1/2 cup granulated sugar
- 1 teaspoon vanilla extract
- 1 cup heavy whipping cream, cold
- 10 gluten-free chocolate sandwich cookies, roughly chopped
Equipment / Tools Needed
- 8-inch springform pan
- Electric hand mixer or stand mixer
- Large mixing bowl
- Rubber spatula
- Food processor or a sturdy plastic bag with a rolling pin
Step-by-Step Instructions
Step 1: Prepare the Crust
Start by crushing your gluten-free cookies into a fine, sand-like consistency using a food processor or by placing them inside a bag and crushing them with a rolling pin. Transfer the crumbs to a bowl and pour in the melted butter. Mix until the texture resembles wet sand. Press this mixture firmly into the bottom of your springform pan to create an even, compact base. Place the pan in the freezer for 15 minutes to set.
Step 2: Whip the Cream
In a separate chilled bowl, whip the heavy cream until stiff, glossy peaks form. Using cold cream and a cold bowl is the secret to getting the right aeration, which gives the cheesecake its signature airy consistency. Set the whipped cream aside for a moment.
Step 3: Create the Filling
In your main mixing bowl, beat the softened cream cheese with sugar and vanilla extract until the mixture is completely smooth and free of lumps. You want the color to look pale and consistent. Gently fold in the whipped cream using a rubber spatula until the mixture looks like a uniform, fluffy cloud.
Step 4: Combine and Chill
Fold in the roughly chopped gluten-free cookie pieces into the cheese mixture. Pour the filling over your prepared crust, smoothing the top with your spatula. Cover the pan with plastic wrap and refrigerate for at least 6 hours, or overnight for the best results. The cheesecake should feel firm to the touch when pushed lightly in the center.
Tips & Tricks
- Ensure your cream cheese is at true room temperature before mixing to prevent lumps in the filling.
- For the cleanest slices, run your knife under hot water and wipe it clean between every cut.
- Do not skimp on the chilling time; the cheesecake needs that duration to set its proteins and achieve a sliceable structure.
Serving Suggestions
Serve this cheesecake chilled, either on its own or with a light dusting of cocoa powder. It pairs beautifully with fresh berries like strawberries or raspberries, which provide a tart contrast to the rich chocolate and cream flavors.
Variations / Substitutions
You can swap the vanilla extract for almond extract to add a nutty depth to the flavor profile. If you prefer a more intense chocolate experience, feel free to drizzle a homemade chocolate ganache over the top once the cake has fully set in the refrigerator.
Storage and Reheating
Store leftovers in the refrigerator, covered with plastic wrap or in an airtight container, for up to 4 days. While you can freeze the cheesecake for up to a month, it is best enjoyed from the fridge to preserve the creaminess and texture. If frozen, thaw it in the refrigerator overnight before serving.
Nutritional Info
Calories: 380 kcal
Protein: 4g
Carbohydrates: 32g
Fat: 26g
Conclusion
This gluten free no bake Oreo cheesecake is a testament to how simple ingredients, when handled with care, can transform into a luxury dessert. Its balance of textures and accessibility makes it a staple for anyone avoiding gluten.
Enjoy the process of creating this treat and sharing it with those you love. There is nothing quite like a homemade dessert that looks as good as it tastes.
FAQ
Can I use a different type of cookie for the crust?
Yes, you can use any gluten-free chocolate wafer or graham cracker equivalent. The main goal is to ensure the cookie has enough sugar and fat content to bind properly with the butter.
How far in advance can I make this?
You can effectively make this 24 hours in advance. It actually benefits from a longer setting time in the refrigerator, so it is a perfect make-ahead project for hosting.
Why did my cheesecake not set properly?
The most common cause for a runny cheesecake is using cream cheese that has too much moisture or not whipping the heavy cream to stiff enough peaks. Always use full-fat cream cheese for the best structural results.
Can I freeze this dessert successfully?
Yes, but the texture becomes more like an ice cream cake once frozen. If you plan to freeze it, let it sit on the counter for 10 minutes before slicing to make it easier to cut through.
Gluten Free No Bake Oreo Cheesecake
Ingredients
- 20 gluten-free chocolate sandwich cookies (crushed into fine crumbs)
- 4 tablespoons unsalted butter (melted)
- 16 ounces cream cheese (softened)
- 1/2 cup granulated sugar
- 1 teaspoon vanilla extract
- 1 cup heavy whipping cream (cold)
- 10 gluten-free chocolate sandwich cookies (roughly chopped)
Instructions
- Crush 20 cookies into fine crumbs and stir with melted butter until the mixture resembles wet sand.
- Press the crumb mixture firmly into the bottom of an 8-inch springform pan and freeze for 15 minutes.
- In a chilled bowl, whip the heavy cream until stiff, glossy peaks form and set aside.
- In a separate large bowl, beat the softened cream cheese with granulated sugar and vanilla extract until smooth and creamy.
- Gently fold the whipped cream into the cream cheese mixture until fully combined.
- Fold in the roughly chopped cookies.
- Pour the filling over the prepared crust, smoothing the top with a spatula.
- Refrigerate for at least 4 hours, or until set, before slicing and serving.