
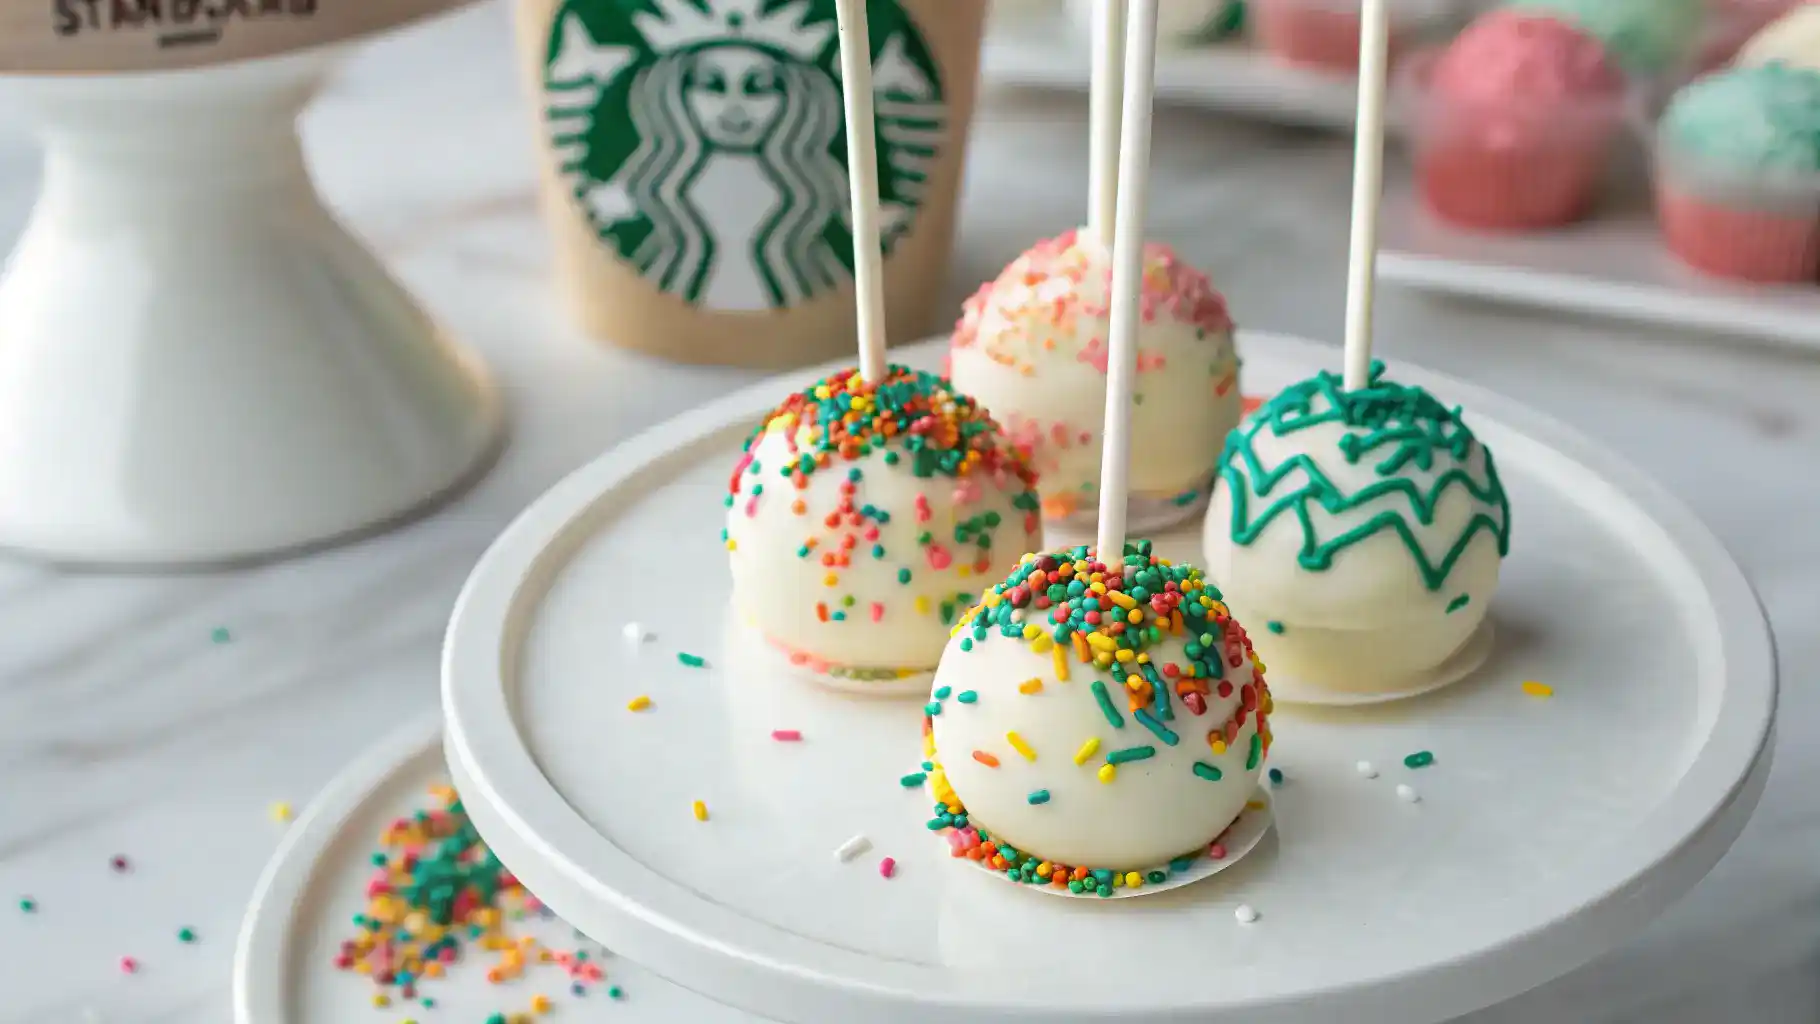
Are you ready to indulge in a sweet treat that’s not only fun to make but also incredibly delicious? The Starbucks Cake Pop Recipe is your ticket to creating these delightful bite-sized desserts right in your own kitchen. Not only are they easy to prepare, but they also offer endless possibilities for customization. Whether you’re planning a birthday party, a cozy gathering, or simply want to enjoy a homemade dessert, these cake pops are sure to impress. So, gather your ingredients and let’s dive into this delightful adventure of flavors and creativity!
Table of Contents
Table of Contents
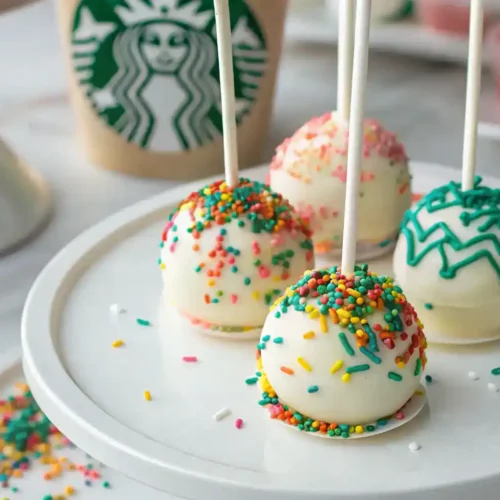
Starbucks Cake Pop Recipe
Equipment
- 1 Baking sheet For placing cake balls.
- 1 Microwave-safe bowl For melting chocolate.
- 1 Cake pop stand or Styrofoam block For holding cake pops upright while they set.
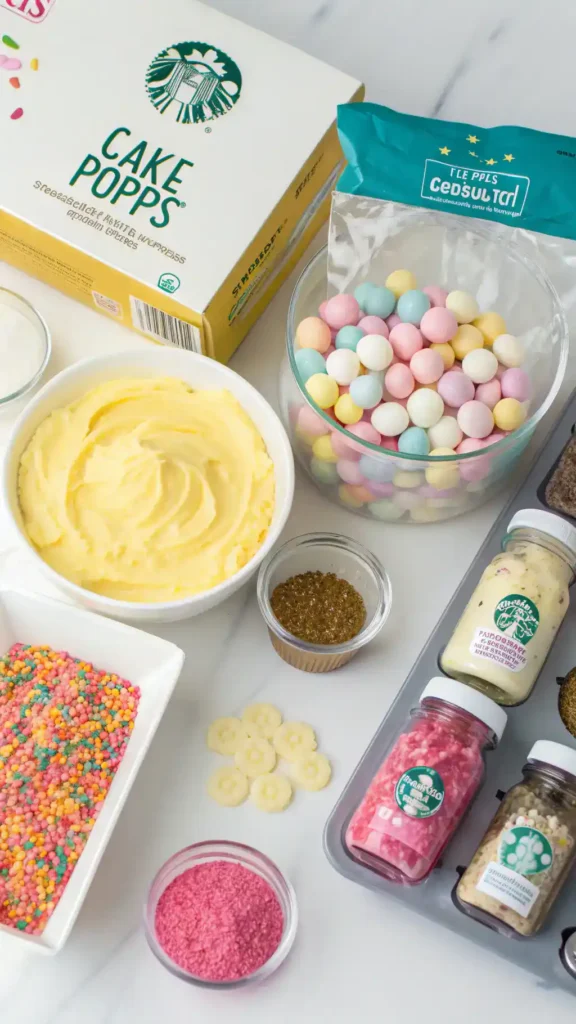
Ingredients
Cake Base
- 1 box vanilla cake mix Foundation of your cake pops.
- 1 cup cream cheese frosting Adds moisture and richness.
Coating
- 1 cup candy melts Choose your favorite color or flavor.
- to taste colorful sprinkles For decoration.
- 12 lollipop sticks Essential for handling and presentation.
Instructions
Preparation
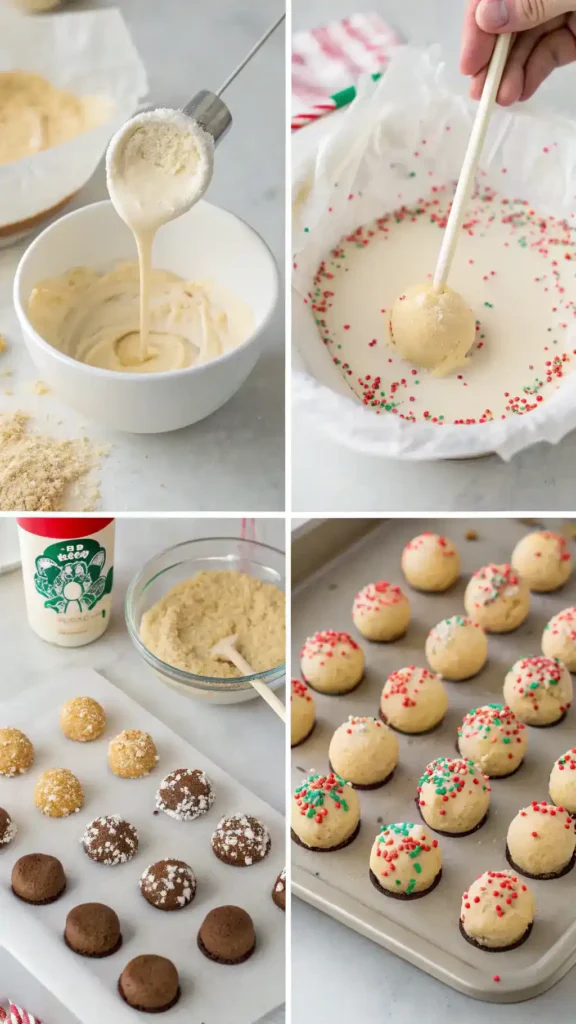
- Start by baking a cake using your favorite cake mix. Vanilla works wonderfully, but feel free to experiment with other flavors. Once baked, let it cool completely.
Crumbling
- After the cake has cooled, crumble it into a large mixing bowl. Use your hands or a fork to break it down into fine crumbs.
Mixing
- Next, add about 1/2 cup of cream cheese frosting to the crumbled cake. Mix it thoroughly until the mixture is moist and holds together. If it feels too dry, add a bit more frosting.
Shaping
- Now, take small portions of the mixture and roll them into balls, about 1 inch in diameter. Place them on a baking sheet lined with parchment paper.
Chilling
- To ensure they hold their shape, chill the cake balls in the freezer for about 15-20 minutes. This step is crucial for easy coating later.
Melting Chocolate
- While the cake balls are chilling, melt your chocolate coating. You can use dark chocolate, white chocolate, or colorful candy melts. Melt them in a microwave-safe bowl, stirring every 30 seconds until smooth.
Dipping Sticks
- Take lollipop sticks and dip one end into the melted chocolate. This helps the stick adhere to the cake ball.
Coating Cake Pops
- Insert the stick into the chilled cake ball, then dip the entire ball into the melted chocolate. Ensure it’s fully coated, then gently tap off any excess chocolate.
Adding Sprinkles
- Before the chocolate sets, decorate your cake pops with colorful sprinkles. This adds a festive touch and makes them visually appealing.
Setting
- Place the finished cake pops upright in a cake pop stand or a block of Styrofoam to allow the chocolate to harden completely.
Notes
Key Benefits
Have you ever craved those delightful Starbucks cake pops? Well, with this Starbucks Cake Pop Recipe, you can recreate that magic right in your kitchen! Here are some key benefits that make this recipe a must-try:
- Easy Dessert: This recipe is straightforward, making it perfect for both novice and experienced bakers. You’ll find that whipping up these treats is a breeze!
- Bite-Sized Treat: Cake pops are the ultimate bite-sized dessert. They’re easy to enjoy on the go, and who doesn’t love a sweet treat that fits in the palm of your hand?
- Homemade Goodness: There’s something special about homemade desserts. With this Starbucks Cake Pop Recipe, you can control the ingredients, ensuring a fresher and more delicious treat.
- Customizable Flavors: One of the best parts? You can customize your cake pops! Whether you prefer chocolate, vanilla, or even red velvet, the choice is yours. Add your favorite sprinkles or toppings for a personal touch!
- Fun for Kids: Making cake pops is a fun activity for kids. They can help with mixing, shaping, and decorating, making it a great family bonding experience.
- Perfect Party Snacks: These cake pops are not only delicious but also visually appealing. They make fantastic party snacks that will impress your guests and add a festive touch to any gathering.
In summary, this Starbucks Cake Pop Recipe allows you to enjoy a delightful homemade treat that’s perfect for any occasion. So, gather your ingredients and get ready to create some sweet memories!
Ingredients
To create your very own Starbucks Cake Pop Recipe, you’ll need a handful of simple yet delightful ingredients. Each component plays a crucial role in achieving that perfect balance of flavor and texture. Here’s what you’ll need:
- 1 box of vanilla cake mix – This serves as the foundation of your cake pops. You can choose any flavor you love, but vanilla is a classic choice.
- 1 cup of cream cheese frosting – This adds moisture and richness to your cake pops. Feel free to use store-bought or homemade frosting for a personal touch.
- 1 cup of candy melts – Choose your favorite color or flavor. These will coat your cake pops and provide that irresistible sweetness.
- Colorful sprinkles – Not only do they add a festive flair, but they also make your cake pops visually appealing. Use any sprinkles you have on hand!
- Lollipop sticks – These are essential for easy handling and presentation. You can find them at craft stores or online.
Gathering these ingredients is the first step in your cake pop-making adventure. Remember, the beauty of this Starbucks Cake Pop Recipe lies in its versatility. You can easily customize flavors and colors to suit your taste or occasion. So, let’s get started on creating these delightful bite-sized treats!
How to Make Starbucks Cake Pop Recipe
Follow these straightforward steps to create your own Starbucks cake pop recipe at home. This easy recipe is not only fun but also allows for customization, making it perfect for any occasion.
- Prepare the Cake: Start by baking a cake using your favorite cake mix. Vanilla works wonderfully, but feel free to experiment with other flavors. Once baked, let it cool completely.
- Crumble the Cake: After the cake has cooled, crumble it into a large mixing bowl. Use your hands or a fork to break it down into fine crumbs.
- Add Frosting: Next, add about 1/2 cup of cream cheese frosting to the crumbled cake. Mix it thoroughly until the mixture is moist and holds together. If it feels too dry, add a bit more frosting.
- Shape the Cake Pops: Now, take small portions of the mixture and roll them into balls, about 1 inch in diameter. Place them on a baking sheet lined with parchment paper.
- Chill the Balls: To ensure they hold their shape, chill the cake balls in the freezer for about 15-20 minutes. This step is crucial for easy coating later.
- Melt the Chocolate: While the cake balls are chilling, melt your chocolate coating. You can use dark chocolate, white chocolate, or colorful candy melts. Melt them in a microwave-safe bowl, stirring every 30 seconds until smooth.
- Dip the Sticks: Take lollipop sticks and dip one end into the melted chocolate. This helps the stick adhere to the cake ball.
- Coat the Cake Pops: Insert the stick into the chilled cake ball, then dip the entire ball into the melted chocolate. Ensure it’s fully coated, then gently tap off any excess chocolate.
- Add Sprinkles: Before the chocolate sets, decorate your cake pops with colorful sprinkles. This adds a festive touch and makes them visually appealing.
- Let Them Set: Place the finished cake pops upright in a cake pop stand or a block of Styrofoam to allow the chocolate to harden completely.
By following these steps, you’ll have delicious Starbucks-inspired cake pops that are perfect for sharing or enjoying yourself. Remember, this Starbucks cake pop recipe is all about creativity, so feel free to mix and match flavors and decorations!
Pro Tips, Variations & Common Problems
Creating the perfect Starbucks Cake Pop Recipe at home can be a delightful experience, but it does come with its challenges. Here are some expert tips and variations to help you troubleshoot and elevate your cake pop game.
Pro Tips
– Chill Before Coating: After shaping your cake pops, chill them in the freezer for about 15-20 minutes. This step helps the cake pops hold their shape during the coating process.
– Use Quality Chocolate: For a smooth coating, opt for high-quality chocolate or candy melts. Additionally, temper your chocolate for a glossy finish that hardens perfectly.
– Dipping Technique: When dipping, swirl the cake pop in the chocolate and gently tap it against the edge of the bowl to remove excess coating. This technique ensures an even layer without drips.
– Stick Stability: To prevent cake pops from falling off the sticks, dip the stick into the melted chocolate before inserting it into the cake ball. This creates a secure bond.
Flavor Variations
– Cake Mix Choices: While vanilla is classic, feel free to experiment with different cake mixes like chocolate, red velvet, or even lemon for a refreshing twist.
– Frosting Flavors: Instead of traditional cream cheese frosting, try using chocolate frosting or even a flavored buttercream to complement your cake mix.
– Coating Options: Besides chocolate, consider using white chocolate or colored candy melts for a fun and festive look. You can also drizzle contrasting colors on top for added flair.
– Add-Ins: For a unique touch, mix in mini chocolate chips, nuts, or even sprinkles into the cake mixture before shaping.
Common Problems & Solutions
– Crumbly Cake Pops: If your cake pops are too crumbly, add a bit more frosting. Conversely, if they are too moist, add a little more cake crumbles to achieve the right consistency.
– Chocolate Not Coating Smoothly: If your chocolate is too thick, add a teaspoon of vegetable oil or shortening to thin it out. This adjustment will help achieve a smoother coating.
– Cake Pops Falling Apart: Ensure your cake pops are chilled adequately before dipping. Additionally, avoid overmixing the cake and frosting, as this can lead to a mushy texture.
– Storage Issues: To keep your cake pops fresh, store them in an airtight container in the refrigerator. If you want to freeze them, place them in a single layer on a baking sheet, freeze until solid, and then transfer to a freezer-safe container.
With these pro tips and variations, you’ll be well on your way to mastering the Starbucks Cake Pop Recipe. Enjoy the process, and don’t hesitate to get creative with your flavors and decorations!
Serving Suggestions
When it comes to serving your delightful Starbucks Cake Pop recipe, the possibilities are as vibrant as the treats themselves. Traditionally, these bite-sized wonders are perfect for sharing, making them an ideal addition to any gathering. Here are some engaging ways to present your homemade cake pops:
- Dessert Table Delight: Arrange your cake pops on a decorative dessert platter. Their colorful coatings and fun shapes will instantly catch the eye, making them a centerpiece at birthday parties or celebrations.
- Gift Ideas: Package your cake pops in clear treat bags tied with colorful ribbons. This thoughtful gesture makes for a sweet gift for friends and family, especially during holidays or special occasions.
- Coffee Pairings: Serve your cake pops alongside a steaming cup of coffee or tea. The combination of flavors creates a delightful afternoon treat, perfect for a cozy gathering with friends.
- Kid-Friendly Snacks: Kids love these fun treats! Present them at playdates or school events, and watch as they disappear in no time. You can even let the little ones help decorate their own cake pops for added fun.
- Seasonal Themes: Customize your cake pops for various holidays. For instance, use red and green sprinkles for Christmas or pastel colors for Easter. This not only enhances their visual appeal but also adds a festive touch to your celebrations.
Ultimately, the Starbucks Cake Pop Recipe allows you to create a delightful experience for your guests. Whether you’re hosting a party or simply indulging in a sweet treat, these cake pops are sure to impress. So, gather your loved ones, and enjoy the joy of sharing these delicious homemade delights!
Preserving and Reheating Your Starbucks Cake Pop Recipe
To truly enjoy your homemade Starbucks Cake Pop recipe, proper storage and reheating are essential. By following these tips, you can maintain their delightful flavor and texture, ensuring they remain a treat worth savoring.
Storage Tips
Firstly, to keep your Starbucks Cake Pop recipe fresh, store them in an airtight container. This prevents moisture loss and protects them from absorbing any unwanted odors. If you plan to enjoy them within a week, simply place the container in the refrigerator. However, if you want to extend their shelf life, consider freezing them. In the freezer, your cake pops can last for up to three months. Just be sure to wrap each cake pop individually in plastic wrap before placing them in a freezer-safe bag or container. This extra layer helps prevent freezer burn.
Moreover, always label your containers with the date to keep track of freshness. When storing, ensure your refrigerator is set to 40°F (4°C) or below to inhibit bacterial growth. Remember, if you notice any unusual smells or textures, it’s best to discard them to avoid any food safety issues.
Reheating Methods
When it comes to reheating your Starbucks Cake Pop recipe, the goal is to maintain their moistness and flavor. While reheating is not always necessary, if you prefer them warm, here are some effective methods. For the best results, use an oven. Preheat it to 300°F (150°C). Place your cake pops on a baking sheet lined with parchment paper. Heat them for about 5-7 minutes, checking frequently to ensure they don’t dry out.
Alternatively, if you’re short on time, the microwave can be a quick option. Place a cake pop on a microwave-safe plate and cover it with a damp paper towel. Heat it on medium power for about 10-15 seconds. This method adds moisture back into the cake pop, keeping it soft and delicious.
For those who own an air fryer, this can also be a great way to reheat cake pops. Set the air fryer to 250°F (120°C) and heat for about 3-4 minutes. This method gives a slight crispness to the outer coating while keeping the inside moist.
In summary, whether you choose to refrigerate or freeze your Starbucks Cake Pop recipe, proper storage will keep them delightful for days. When it’s time to enjoy them again, reheating with care will ensure they taste just as good as when you first made them. So, go ahead and indulge in your homemade treats, knowing they’re stored and reheated like a pro!
Conclusion
As you wrap up your journey with this delightful Starbucks Cake Pop Recipe, remember that creating these easy, bite-sized treats is not only simple but also incredibly rewarding. With just a few ingredients and straightforward steps, you can whip up a batch of homemade cake pops that are perfect for any occasion. Whether you’re hosting a party, looking for a fun activity with kids, or simply indulging your sweet tooth, these customizable flavors will surely impress. So, why not give it a try? I encourage you to dive into the process and enjoy every moment of baking!
Share Your Experience
I would love to hear about your cake pop adventures! Feel free to share your results or ask any questions in the comments below. Additionally, don’t hesitate to experiment with different flavors or toppings to make these cake pops uniquely yours. Remember, cooking is all about creativity and fun, and this Starbucks Cake Pop Recipe is a fantastic way to unleash your inner chef. So, gather your ingredients, roll up your sleeves, and let’s get baking!
FAQs About Starbucks Cake Pop Recipe
Here are some common questions you might have while making your own Starbucks cake pops at home. We’ve got you covered with helpful answers!
1. Can I use any cake mix for the Starbucks Cake Pop Recipe?
Absolutely! You can use any flavor of cake mix you prefer. Vanilla, chocolate, or even red velvet work wonderfully. Just remember that the frosting should complement the cake flavor for the best results.
2. How do I prevent my cake pops from falling off the stick?
To ensure your cake pops stay on the stick, make sure to chill them in the freezer for about 15-30 minutes before dipping. Additionally, use a thicker coating of chocolate or candy melts to help secure them better.
3. What can I use instead of frosting in the Starbucks Cake Pop Recipe?
If you’re looking for a substitute, you can use cream cheese or even a flavored yogurt. Just keep in mind that the consistency should be similar to frosting to help bind the cake crumbs together.
4. How should I store my cake pops?
To maintain freshness, store your cake pops in an airtight container. They can last in the refrigerator for up to a week. If you want to keep them longer, consider freezing them. Just make sure to wrap them well!
5. Can I customize the flavors of my cake pops?
Definitely! You can mix and match different cake flavors and frostings. Moreover, feel free to experiment with various coatings, such as white chocolate or colored candy melts, to create unique and fun designs!