

Are you ready to indulge in a dessert that feels like a dream? The cloud cake recipe is not only light and airy, but it also delivers a delightful treat that will impress dessert lovers and home bakers alike. This cake’s fluffy texture makes it an ideal choice for various occasions, whether you’re celebrating a special event or simply satisfying a sweet craving. Moreover, it serves as a low-fat option, allowing health-conscious bakers to enjoy a slice without the guilt. So, let’s dive into this easy baking adventure and discover how to create a cloud cake that’s as delicious as it is light!
Table of Contents
Table of Contents
cloud cake recipe
Equipment
- 1 Mixing Bowl For whipping egg whites and mixing ingredients.
- 1 Cake Pan Lightly greased or lined with parchment paper.
- 1 Whisk or Electric Mixer For whipping egg whites.
Ingredients
Dry Ingredients
- 1 cup Cake Flour Provides a light and airy texture.
- 1 tbsp Baking Powder Leavening agent for rising.
- 1/2 cup Granulated Sugar or Sugar Alternatives Adds sweetness.
Wet Ingredients
- 4 large Egg Whites Whipped to stiff peaks for fluffiness.
- 1 tsp Vanilla Extract Enhances flavor.
- 1/4 tsp Cream of Tartar Stabilizes egg whites.
Instructions
Preparation
- Gather your ingredients and preheat your oven to 350°F (175°C).
Egg Separation
- Carefully separate the egg whites from the yolks, ensuring no yolks mix with the whites.
Whipping
- Whip the egg whites until stiff peaks form.
Mixing Dry Ingredients
- In another bowl, combine cake flour, baking powder, and sugar. Whisk together.
Combining Mixtures
- Fold the dry ingredients into the whipped egg whites gently.
Adding Flavor
- Add vanilla extract and stir gently.
Baking
- Pour the batter into the prepared cake pan and bake for 25-30 minutes.
Cooling
- Let the cake cool in the pan for 10 minutes, then transfer to a wire rack to cool completely.
Notes
| Calories | Fat | Protein | Carbs |
|---|---|---|---|
| 120 | 1g | 3g | 24g |
Key Benefits
The cloud cake recipe offers a delightful combination of lightness and flavor, making it an ideal dessert for various occasions. Its airy texture is perfect for those seeking a light dessert without the heaviness of traditional cakes. Here are some key benefits that make this recipe a must-try:
- Light and Airy: The cloud cake recipe is known for its fluffy texture, which is achieved by whipping egg whites until they form stiff peaks. This technique not only creates a light dessert but also adds a unique mouthfeel that dessert lovers will appreciate.
- Low-Fat Option: If you’re looking for a low-fat option, this cloud cake recipe can be a great choice. By using egg whites and cake flour, you can enjoy a sweet treat without the guilt, especially when compared to richer cakes.
- Easy Baking: For home bakers, this recipe is straightforward and requires minimal ingredients. With just a few simple steps, you can create a stunning dessert that impresses family and friends.
- Versatile Flavor: The cloud cake recipe serves as a blank canvas for various flavors. You can easily customize it by adding vanilla extract, citrus zest, or even almond extract, making it a delightful treat for any palate.
- Perfect for Any Occasion: Whether it’s a birthday, holiday, or just a casual gathering, this cloud cake fits right in. Its lightness makes it an excellent choice for warm weather or after a hearty meal.
In summary, the cloud cake recipe not only satisfies your sweet tooth but also aligns with health-conscious choices. By incorporating this recipe into your baking repertoire, you can enjoy a delicious dessert that is both light and flavorful, ensuring that everyone at the table leaves happy.
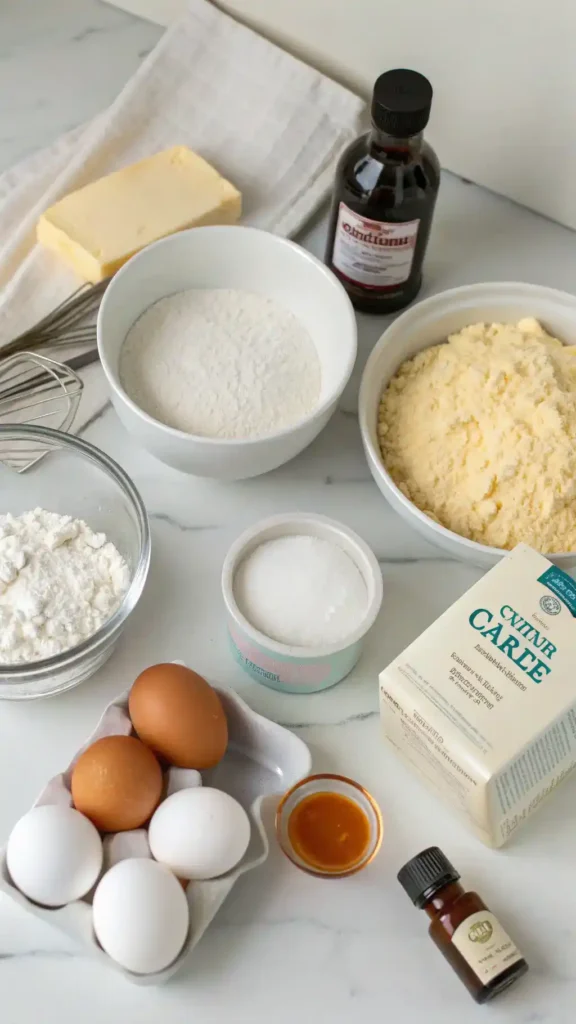
Ingredients
Creating a cloud cake recipe is all about choosing the right ingredients. Each component plays a crucial role in achieving that signature fluffy texture. Here’s what you’ll need:
- Cake Flour: This is the foundation of your cloud cake recipe. Cake flour has a lower protein content, which helps create a light and airy texture. It’s perfect for those looking for a light dessert.
- Egg Whites: The star of the show! Whipping egg whites until they form stiff peaks is essential for aeration. This step is what gives your cake its delightful fluffiness, making it a low-fat option compared to traditional cakes.
- Baking Powder: This leavening agent helps the cake rise beautifully. It’s important for achieving that airy texture that dessert lovers crave.
- Granulated Sugar or Sugar Alternatives: While sugar adds sweetness, consider using sugar alternatives for a healthier twist. This way, you can enjoy your cloud cake recipe without the guilt!
- Vanilla Extract: A splash of vanilla adds a warm, inviting flavor to your cake. It enhances the overall taste, making each bite a delightful treat.
- Cream of Tartar: This ingredient stabilizes the egg whites, ensuring they maintain their structure while whipping. It’s a small addition that makes a big difference in your cloud cake recipe.
By carefully selecting these ingredients, you’re setting yourself up for baking success. Each one contributes to the overall lightness and flavor of your cloud cake, making it a perfect dessert for any occasion. So, gather your ingredients and get ready to whip up something truly special!
How to Make Cloud Cake Recipe
Making a cloud cake is a delightful experience, and with this step-by-step guide, you’ll find it easy to create this light dessert at home. Follow these instructions closely, and you’ll be rewarded with a fluffy texture that dessert lovers will adore.
- Gather Your Ingredients: Start by collecting all the necessary ingredients. You’ll need cake flour, egg whites, baking powder, sugar, and vanilla extract. Having everything ready will make the process smoother.
- Preheat Your Oven: Before you begin mixing, preheat your oven to 350°F (175°C). This ensures that your cloud cake bakes evenly and achieves that perfect airy texture.
- Separate the Eggs: Carefully separate the egg whites from the yolks. It’s crucial to keep the yolks free of any egg whites, as even a small amount can prevent the whites from whipping properly.
- Whip the Egg Whites: In a mixing bowl, use a whisk or electric mixer to beat the egg whites until stiff peaks form. This step is vital for achieving the fluffiness that defines a cloud cake.
- Mix Dry Ingredients: In another bowl, combine the cake flour, baking powder, and sugar. Whisk them together to ensure they are evenly distributed. This mixture will provide the base for your cloud cake.
- Combine Mixtures: Gradually fold the dry ingredients into the whipped egg whites. Use a spatula to gently incorporate them, being careful not to deflate the egg whites. This technique is essential for maintaining that light texture.
- Add Vanilla Extract: Once combined, add a splash of vanilla extract to enhance the flavor. Stir gently to mix it in without losing the airiness.
- Prepare the Cake Pan: Lightly grease a cake pan or line it with parchment paper. This will help your cloud cake release easily once it’s baked.
- Pour and Bake: Pour the batter into the prepared cake pan. Bake in the preheated oven for about 25-30 minutes, or until the top is golden and a toothpick inserted comes out clean.
- Cool the Cake: After baking, remove the cake from the oven and let it cool in the pan for about 10 minutes. Then, transfer it to a wire rack to cool completely. This step is crucial to prevent the cake from collapsing.
By following these steps, you’ll master the fluffy cake method effortlessly. Enjoy your homemade cloud cake, and don’t forget to share it with friends and family!
Pro Tips, Variations, and Common Problems
When it comes to mastering the cloud cake recipe, a few pro tips can make all the difference. Firstly, ensure your egg whites are at room temperature; this helps them whip up to a greater volume, resulting in that signature fluffy texture. Additionally, consider using a clean, dry mixing bowl to avoid any grease that could hinder the whipping process. If you want to enhance the flavor, try adding a teaspoon of citrus zest or a splash of almond extract. These small adjustments can elevate your cloud cake to new heights!
For those looking to experiment, there are plenty of variations to explore. You can substitute cake flour with all-purpose flour, but be aware that this may slightly affect the cake’s lightness. Alternatively, for a healthier twist, use sugar alternatives like coconut sugar or honey. These options not only reduce calories but also add unique flavors to your cloud cake recipe.
Now, let’s address some common problems you might encounter while baking. If your cake deflates after baking, it’s likely that the egg whites weren’t whipped to stiff peaks or were over-folded into the batter. To prevent this, whip the egg whites until they form firm peaks and gently fold them into the mixture using a spatula. This technique preserves the airiness that is crucial for a successful cloud cake.
Moreover, if your cake is too dense, check your baking powder’s freshness. Expired baking powder can lead to a heavy texture. Always store it in a cool, dry place and replace it every six months for optimal results. Lastly, if you notice cracks on the surface, this can happen if the oven temperature is too high. Therefore, keep an eye on your oven settings and consider using an oven thermometer for accuracy.

By following these tips and troubleshooting advice, you’ll be well on your way to creating a delightful cloud cake that impresses everyone. Remember, baking is as much about enjoying the process as it is about the final product!
Serving Suggestions
Cloud cake is not just a dessert; it’s an experience that can elevate any occasion. Whether you’re celebrating a birthday, hosting a brunch, or simply enjoying a cozy evening at home, this light dessert is sure to impress. Here are some delightful serving ideas to make your cloud cake shine:
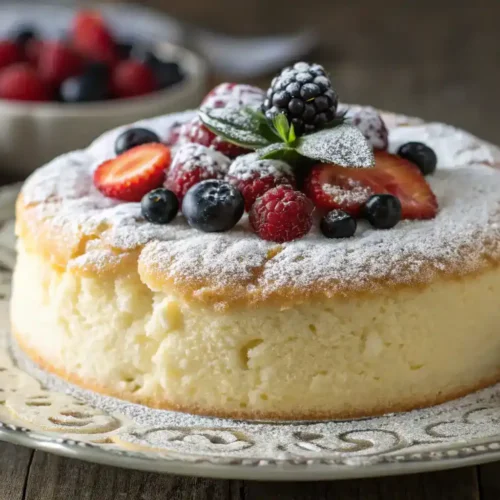
- Fresh Fruit Topping: Serve your cloud cake with a medley of fresh berries or sliced peaches. The vibrant colors and natural sweetness complement the airy texture beautifully.
- Whipped Cream Delight: A dollop of freshly whipped cream adds a luxurious touch. You can even flavor the cream with a hint of vanilla or almond extract for an extra layer of flavor.
- Chocolate Drizzle: For chocolate lovers, a drizzle of melted dark chocolate or a sprinkle of cocoa powder can transform your cloud cake into a decadent treat.
- Powdered Sugar Dusting: A light dusting of powdered sugar not only enhances the presentation but also adds a touch of sweetness without overwhelming the cake’s delicate flavor.
- Layered Parfait: For a fun twist, consider layering pieces of cloud cake with yogurt and fruit in a glass. This not only looks stunning but also makes for a refreshing dessert option.
- Serving Temperature: Enjoy your cloud cake warm for a comforting dessert or chilled for a refreshing treat. Both options highlight its fluffy texture in different ways.
Moreover, pairing your cloud cake with a cup of herbal tea or a light coffee can create a delightful end to any meal. This versatile dessert is perfect for any gathering, ensuring that dessert lovers will leave with smiles on their faces. So, the next time you whip up this cloud cake recipe, remember these serving suggestions to make it truly special!
Preserving and Reheating Your Cloud Cake Recipe
To ensure your cloud cake recipe remains a delightful treat, proper storage and reheating are essential. This light dessert can maintain its airy texture and flavor when stored correctly. Here’s how to do it like a pro!
Storage Tips
Firstly, to keep your cloud cake fresh, store it in an airtight container. This method prevents moisture loss and protects it from absorbing other odors in the refrigerator. Ideally, you should refrigerate your cake for up to five days. If you want to extend its shelf life, consider freezing it. Wrapped tightly in plastic wrap and then placed in a freezer-safe bag, your cloud cake can last up to three months in the freezer. However, remember to label the bag with the date to keep track of its freshness.
Moreover, always ensure your cake has cooled completely before storing it. This step is crucial because placing warm cake in a container can create condensation, leading to spoilage. Additionally, for food safety, avoid leaving your cloud cake out at room temperature for more than two hours. This practice helps prevent bacterial growth and keeps your dessert safe to enjoy.
Reheating Methods
When it comes to reheating your cloud cake recipe, you have several options. The oven is the best choice for restoring its fluffy texture. Preheat your oven to 300°F (150°C). Then, place the cake on a baking sheet and cover it loosely with aluminum foil. This technique helps retain moisture. Heat for about 10-15 minutes, checking periodically to ensure it doesn’t dry out.
If you’re short on time, the microwave can also work. However, be cautious! Place a slice of cake on a microwave-safe plate and cover it with a damp paper towel. This method adds moisture and prevents the cake from becoming rubbery. Heat in 10-15 second intervals until warmed through, but avoid overheating.
Alternatively, if you own an air fryer, you can reheat your cake there as well. Set it to 250°F (120°C) and place the cake in for about 5-7 minutes. This method can give you a nice, slightly crisp exterior while keeping the inside fluffy.
In summary, whether you choose the oven, microwave, or air fryer, the key is to add moisture and reheat at a low temperature. This approach ensures your cloud cake recipe remains as delightful as the day you baked it!
Conclusion
In summary, this cloud cake recipe is a delightful treat that combines simplicity with an airy texture, making it a fantastic choice for both novice and experienced bakers alike. Its lightness allows you to enjoy a sweet indulgence without the heaviness of traditional cakes. Therefore, I encourage you to embrace the joy of baking and give this fluffy cake a try in your own kitchen. You’ll be amazed at how easy it is to create such a wonderful dessert!
Share Your Experience
Once you’ve made your cloud cake, I would love to hear about your results! Feel free to share your thoughts or ask any questions you may have. Additionally, don’t hesitate to experiment with different flavor variations or serving suggestions. For instance, consider adding citrus zest or pairing it with fresh fruit for a refreshing twist. Remember, cooking is all about creativity and fun, and this cloud cake recipe is an excellent canvas for your culinary imagination!
So, gather your ingredients and get started on this easy dessert recipe. With each step, you’ll not only learn but also enjoy the sweet rewards of your efforts. Happy baking, and I can’t wait to see your delicious creations!
FAQs About Cloud Cake Recipe
Here are some common questions about the cloud cake recipe that can help you achieve the perfect fluffy dessert.
1. What makes cloud cake different from regular cake?
Cloud cake is unique because it has an airy texture, primarily due to whipped egg whites. This light dessert is less dense than traditional cakes, making it a delightful treat for those who prefer something less heavy.
2. Can I use all-purpose flour instead of cake flour?
While you can use all-purpose flour, it’s best to stick with cake flour for the cloud cake recipe. Cake flour has a lower protein content, which contributes to that signature fluffy texture. If you must use all-purpose flour, consider sifting it to make it lighter.
3. How do I know when my egg whites are whipped properly?
Egg whites should be whipped until stiff peaks form. This means that when you lift the whisk, the peaks should stand straight up without drooping. If they appear glossy and hold their shape, you’re on the right track!
4. What can I do if my cloud cake collapses after baking?
If your cake collapses, it’s often due to under-whipping the egg whites or over-mixing the batter. Ensure that you whip the egg whites until stiff peaks form and gently fold in the dry ingredients to maintain that airy texture. Additionally, avoid opening the oven door too early while baking.
5. How should I store my cloud cake?
To keep your cloud cake fresh, store it in an airtight container in the refrigerator for up to five days. If you want to enjoy it warm later, you can reheat it in the microwave for a few seconds or in the oven to restore its fluffy texture.