
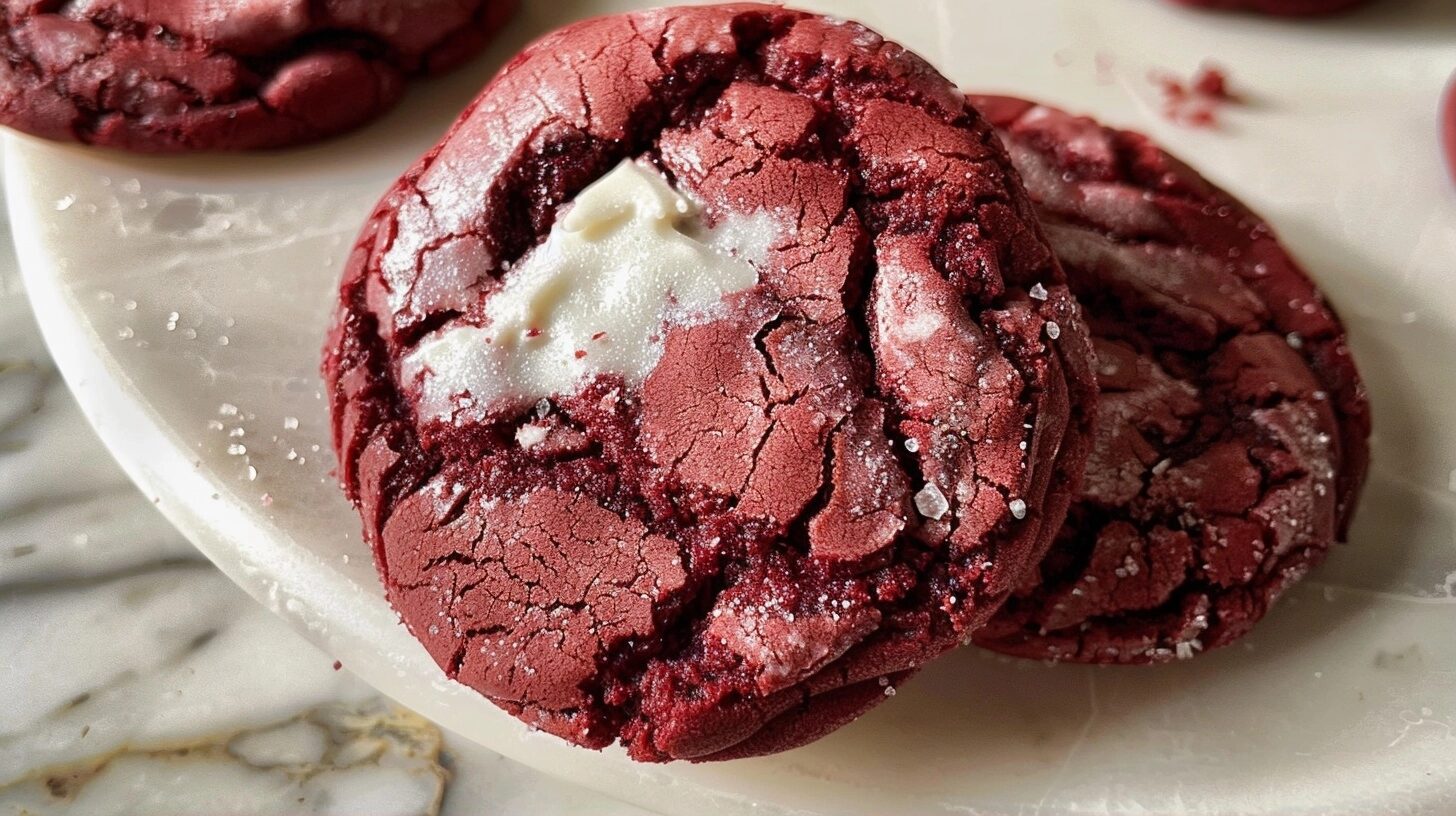
Discover a truly delightful treat with these Red Velvet Cookies. These delightful cookies offer a perfect balance of rich chocolate and tangy cream cheese, all wrapped in that signature vibrant red hue. They are soft, chewy, and utterly irresistible, making them a perfect addition to any cookie platter or a special dessert occasion. Get ready to bake these easy, show-stopping cookies today!
Table of Contents
Table of Contents
Why You’ll Love This Red Velvet Cookies
These Red Velvet Cookies are more than just a pretty face. The moment you bite into one, you’ll experience a unique flavor profile that’s both complex and comforting. The deep cocoa notes are beautifully complemented by a subtle tang, creating a sophisticated taste that isn’t overwhelmingly sweet.
The texture is simply divine. They boast a wonderfully soft and chewy center with slightly crisp edges, a classic cookie dream. This delightful chewiness makes each bite a satisfying experience, unlike dry or crumbly cookies.
Beyond their delicious taste and texture, these cookies are surprisingly simple to make. You don’t need any special skills or fancy equipment, making them perfect for beginner bakers or even a fun activity with kids. Plus, their vibrant color makes them a fantastic conversation starter at parties.
They bring a sense of fun and festivity to any gathering. Imagine a plate piled high with these striking crimson cookies – they just radiate joy and celebration. They are perfect for holidays, birthdays, or simply cheering up a regular Tuesday.
Ingredients of the Red Velvet Cookies
For the Cookies
- unsalted butter, softened
- granulated sugar
- light brown sugar, packed
- eggs
- vanilla extract
- red food coloring (gel or liquid)
- cocoa powder
- all-purpose flour
- baking soda
- salt
- white vinegar
For the Cream Cheese Frosting (Optional Drizzle)
- cream cheese, softened
- unsalted butter, softened
- powdered sugar, sifted
- vanilla extract
- splash of milk (if needed for consistency)
Optional Mix-ins
- white chocolate chips
- semi-sweet chocolate chips
- crushed peppermint candies (for holiday twist)
Equipment / Tools Needed
Mixed measuring cups and spoons
Large mixing bowl
Electric mixer (handheld or stand mixer)
Rubber spatula or wooden spoon
Small bowl
Whisk
Baking sheets
Parchment paper or silicone baking mats
Wire cooling rack
Offset spatula or knife (for frosting, if using)
Step-by-Step Instructions
Step 1: Prepare the Wet Ingredients and Color
In a large mixing bowl, cream together the softened unsalted butter, granulated sugar, and packed light brown sugar until the mixture is light and fluffy. This usually takes about 2-3 minutes with an electric mixer. Beat in the eggs one at a time, ensuring each is fully incorporated before adding the next. Stir in the vanilla extract and the red food coloring. Add enough red food coloring to achieve a vibrant, deep red hue. For gel coloring, start with about 1-2 teaspoons and add more as needed. For liquid coloring, you may need more.
Step 2: Combine Dry Ingredients
In a separate medium bowl, whisk together the cocoa powder, all-purpose flour, baking soda, and salt. Whisking ensures that the leavening agent and salt are evenly distributed throughout the flour, which is crucial for consistent cookie texture and rise. Make sure there are no clumps of cocoa powder.
Step 3: Combine Wet and Dry Mixtures
Gradually add the dry ingredients to the wet ingredients in the large mixing bowl. Mix on low speed or stir with a rubber spatula until just combined. Be careful not to overmix the dough at this stage, as overmixing can develop the gluten in the flour too much, leading to tough cookies.
Step 4: Add Vinegar and Mix-ins
In a small bowl, combine the white vinegar with a tablespoon or two of the dough mixture, then add this back into the main dough. The vinegar reacts with the baking soda to create a slight lift and tender crumb, enhancing the tangy flavor. If you’re adding any mix-ins like white chocolate chips or semi-sweet chocolate chips, gently fold them in now using a spatula. Don’t over-mix.
Step 5: Chill the Dough
Cover the bowl with plastic wrap and refrigerate the dough for at least 30 minutes, or up to 2 days. Chilling the dough is essential. It allows the gluten to relax, preventing the cookies from spreading too much in the oven, and it helps deepen the flavors. The dough will firm up, making it easier to scoop.
Step 6: Preheat Oven and Prepare Baking Sheets
Preheat your oven to 350°F (175°C). Line your baking sheets with parchment paper or silicone baking mats. This prevents the cookies from sticking and ensures even baking and easy cleanup.
Step 7: Scoop and Bake Cookies
Scoop rounded tablespoons of the chilled dough onto the prepared baking sheets, leaving about 2 inches between each cookie to allow for spreading. You can use a cookie scoop for uniform size. Bake for 9-12 minutes, or until the edges are set and lightly golden, but the centers still look slightly soft. They will continue to cook slightly on the baking sheet after removal from the oven.
Step 8: Cool the Cookies
Let the cookies cool on the baking sheets for 5-10 minutes before transferring them to a wire rack to cool completely. This allows them to firm up properly. If you try to move them too soon, they might break.
Step 9: Prepare Cream Cheese Frosting (Optional)
While the cookies cool, prepare the optional cream cheese drizzle. In a medium bowl, beat together the softened cream cheese and softened butter until smooth. Gradually add the sifted powdered sugar and beat until combined. Add the vanilla extract. If the frosting is too thick, add a splash of milk until it reaches a drizzle-able consistency. Be careful not to make it too thin.
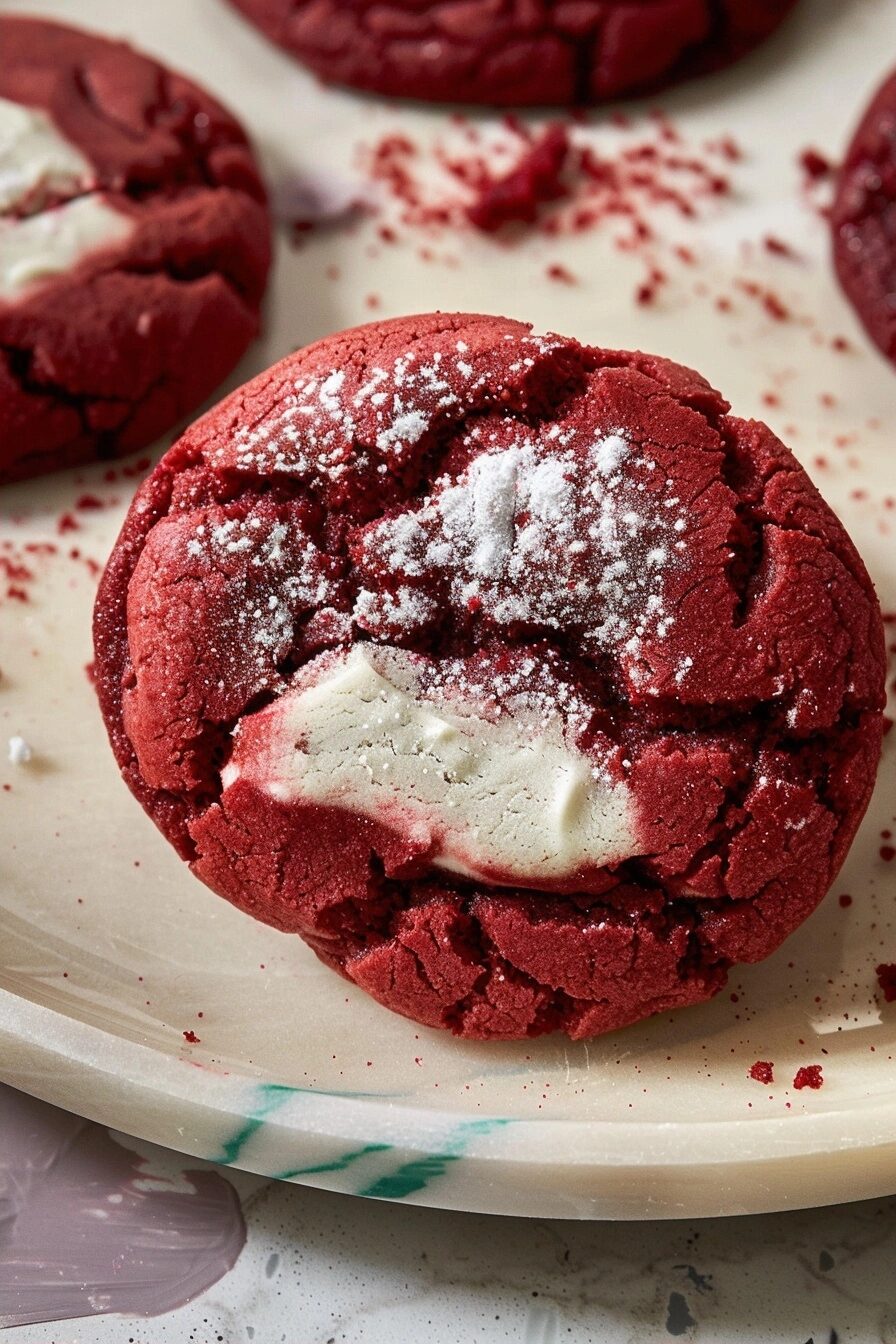
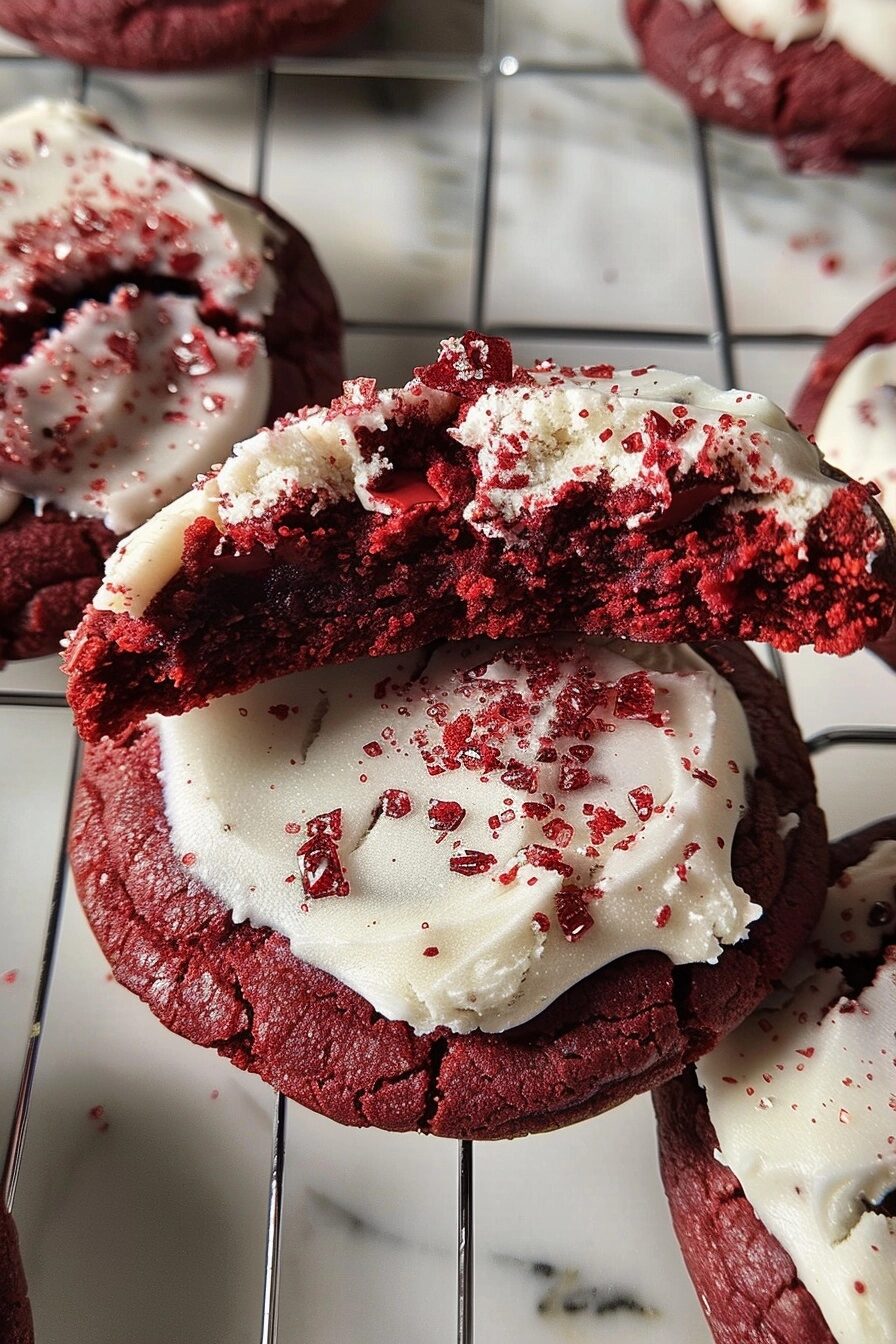
Step 10: Decorate and Serve
Once the cookies are completely cool, you can drizzle them with the cream cheese frosting using a spoon or piping bag, or simply dust them with a little powdered sugar. You can also sandwich two cookies together with a bit of frosting. Arrange on a platter and enjoy!
Tips & Tricks
- Don’t Overbake: The key to chewy Red Velvet Cookies is to pull them out of the oven when the centers still look slightly underdone. They will firm up as they cool.
- Chilling is Key: Resist the urge to skip chilling the dough. It prevents excessive spreading and concentrates the flavors, resulting in a much better cookie.
- Gel vs. Liquid Food Coloring: Gel food coloring provides a more vibrant color with less liquid, which is better for cookie dough. If using liquid, you might need more, but watch out for making the dough too wet.
- Cocoa Powder Quality: Use good quality unsweetened cocoa powder for the best chocolate flavor. Dutch-processed can give a darker, richer hue, but natural cocoa powder works well too.
- Uniform Scooping: Using a cookie scoop ensures all your cookies are roughly the same size, so they bake evenly.
Serving Suggestions
These Red Velvet Cookies are fantastic on their own, especially with their optional cream cheese drizzle. They pair wonderfully with a cold glass of milk, a hot cup of coffee, or a soothing cup of herbal tea. For a festive touch, serve them during the holidays or for Valentine’s Day. They also make a lovely addition to a dessert buffet or a birthday celebration.
Consider making them into sandwich cookies by spreading a dollop of cream cheese frosting between two cooled cookies. For added texture and flavor, you could also gently dip half of each cookie in melted white chocolate before the chocolate sets.
Variations / Substitutions
- Chocolate Chips: Feel free to swap the white chocolate chips for dark or milk chocolate chips, or use a combination of both.
- Spices: A pinch of cinnamon or a tiny amount of espresso powder can enhance the chocolate flavor without overpowering the red velvet essence.
- Nuts: For added crunch, chopped pecans or walnuts can be a delicious addition. Ensure they are finely chopped so they don’t affect the dough’s texture too much.
- Gluten-Free: Use a good quality gluten-free all-purpose flour blend in place of wheat flour. You might need to adjust baking time slightly.
- Dairy-Free: Substitute a dairy-free butter alternative and use a dairy-free cream cheese for the frosting if making. Ensure your chocolate chips are dairy-free as well.
Storage and Reheating
Store completely cooled Red Velvet Cookies in an airtight container at room temperature for up to 3-4 days. If they have cream cheese frosting, it’s best to refrigerate them to keep the frosting fresh. Place a piece of parchment paper between layers if stacking to prevent sticking.
To reheat, you can gently warm them in a low oven (around 250°F or 120°C) for 3-5 minutes, or briefly microwave them for about 10-15 seconds. Be cautious with reheating, especially if they are frosted, as it can easily melt the frosting.
Nutritional Info
Calories: 200-250 kcal (approximate, per cookie, without frosting)
Protein: 2-3g
Carbohydrates: 25-30g
Fat: 10-14g
Conclusion
These Red Velvet Cookies are a delightful twist on a classic favorite, offering a unique flavor and stunning visual appeal. The perfect balance of chocolatey richness and subtle tang, combined with a wonderfully chewy texture, makes them utterly addictive.
Easy enough for a weeknight bake and impressive enough for any special occasion, these cookies are sure to become a go-to recipe. Gather your ingredients and whip up a batch – you won’t regret it!
FAQ
How should I store leftover Red Velvet Cookies?
Store cooled cookies in an airtight container at room temperature for up to 3-4 days. If they have cream cheese frosting, refrigerating them is recommended to maintain freshness and prevent spoilage. Use parchment paper between layers to prevent sticking.
Can I substitute the red food coloring?
While natural alternatives like beet powder exist, they typically don’t provide the same vibrant, consistent red color for red velvet. For the classic look, gel or liquid red food coloring is best. Use gel for more intense color with less liquid added to the dough.
How do I ensure my Red Velvet Cookies are chewy and not cakey?
To achieve a chewy texture, avoid overmixing the dough once the flour is added. Also, slightly underbake the cookies – the centers should still look soft and slightly underdone when you take them out of the oven, as they will continue to cook on the hot baking sheet.
Can I make the Red Velvet Cookie dough ahead of time?
Yes, the cookie dough can be made up to 2 days in advance and stored in the refrigerator. Chilling the dough not only helps with storage but also improves the flavor and texture by allowing the ingredients to meld and the gluten to relax.
Irresistible Red Velvet Cookies
Ingredients
- For the Cookies:
- 1 cup unsalted butter, softened
- 1 cup granulated sugar
- 1/2 cup light brown sugar, packed
- 2 large eggs
- 1 teaspoon vanilla extract
- 1-2 teaspoons red food coloring (gel or liquid)
- 2 tablespoons cocoa powder
- 2 1/2 cups all-purpose flour
- 1 teaspoon baking soda
- 1/2 teaspoon salt
- 1 teaspoon white vinegar
- For the Cream Cheese Frosting (Optional Drizzle):
- 4 oz cream cheese, softened
- 1/4 cup unsalted butter, softened
- 1 1/2 cups powdered sugar, sifted
- 1/2 teaspoon vanilla extract
- 1-2 tablespoons milk (if needed for consistency)
- Optional Mix-ins:
- 1 cup white chocolate chips
- 1 cup semi-sweet chocolate chips
- 1/2 cup crushed peppermint candies (for holiday twist)
Instructions
- Step 1: Prepare the Wet Ingredients and Color
- In a large mixing bowl, cream together the softened unsalted butter, granulated sugar, and packed light brown sugar until the mixture is light and fluffy (about 2-3 minutes with an electric mixer).
- Beat in the eggs one at a time, ensuring each is fully incorporated before adding the next.
- Stir in the vanilla extract and the red food coloring. Add enough red food coloring to achieve a vibrant, deep red hue.
- Step 2: Combine Dry Ingredients
- In a separate small bowl, whisk together the cocoa powder, all-purpose flour, baking soda, and salt.
- Step 3: Mix Wet and Dry Ingredients
- Gradually add the dry ingredients to the wet ingredients, mixing on low speed until just combined. Do not overmix.
- Add the white vinegar to the cookie dough and mix until just incorporated.
- If using optional mix-ins, gently fold them into the dough using a rubber spatula or wooden spoon.
- Step 4: Chill the Dough
- Cover the bowl with plastic wrap and refrigerate the dough for at least 30 minutes. This helps prevent the cookies from spreading too much during baking and deepens the flavor.
- Step 5: Preheat and Prepare Baking Sheets
- Preheat your oven to 350°F (175°C).
- Line baking sheets with parchment paper or silicone baking mats.
- Step 6: Form and Bake Cookies
- Drop rounded tablespoons of chilled dough onto the prepared baking sheets, leaving about 2 inches between cookies.
- Bake for 10-12 minutes, or until the edges are set and the centers are still slightly soft. For a chewier cookie, err on the side of underbaking.
- Step 7: Cool Cookies
- Let the cookies cool on the baking sheets for 5 minutes before transferring them to a wire cooling rack to cool completely.
- Step 8: Prepare Cream Cheese Frosting (Optional)
- While the cookies are cooling, prepare the cream cheese frosting if desired. In a medium bowl, beat together the softened cream cheese and butter until smooth.
- Gradually add the sifted powdered sugar and vanilla extract, beating until well combined.
- If the frosting is too thick, add a splash of milk until you reach your desired drizzling consistency.
- Step 9: Decorate and Serve
- Once the cookies are completely cool, drizzle with the cream cheese frosting or spread a thin layer on top. If using crushed peppermint candies, sprinkle them over the frosting before it sets.
- Serve and enjoy!
Notes
If you don’t have white vinegar, you can substitute it with apple cider vinegar. The vinegar helps to activate the baking soda and contributes to the tender texture.
Make sure all ingredients, especially butter and cream cheese for the frosting, are truly softened to room temperature for the best texture.
Store cooled cookies in an airtight container at room temperature for up to 3 days. If frosted, they may be best stored in the refrigerator.