

This brownie cookie recipe delivers intensely fudgy centers with slightly crisp edges, combining the best of both worlds. Perfect for satisfying your deepest chocolate cravings, these cookies are surprisingly simple to make and always a crowd-pleaser. Get ready for a treat that’s pure bliss.
Table of Contents
Table of Contents
Why You’ll Love This Brownie Cookie Recipe
Imagine biting into a cookie that offers the rich, dense texture of a brownie but in a perfectly portioned, chewy disc. That’s exactly what this recipe achieves. The deep chocolate flavor is undeniable, making each bite a decadent experience without being overwhelmingly sweet.
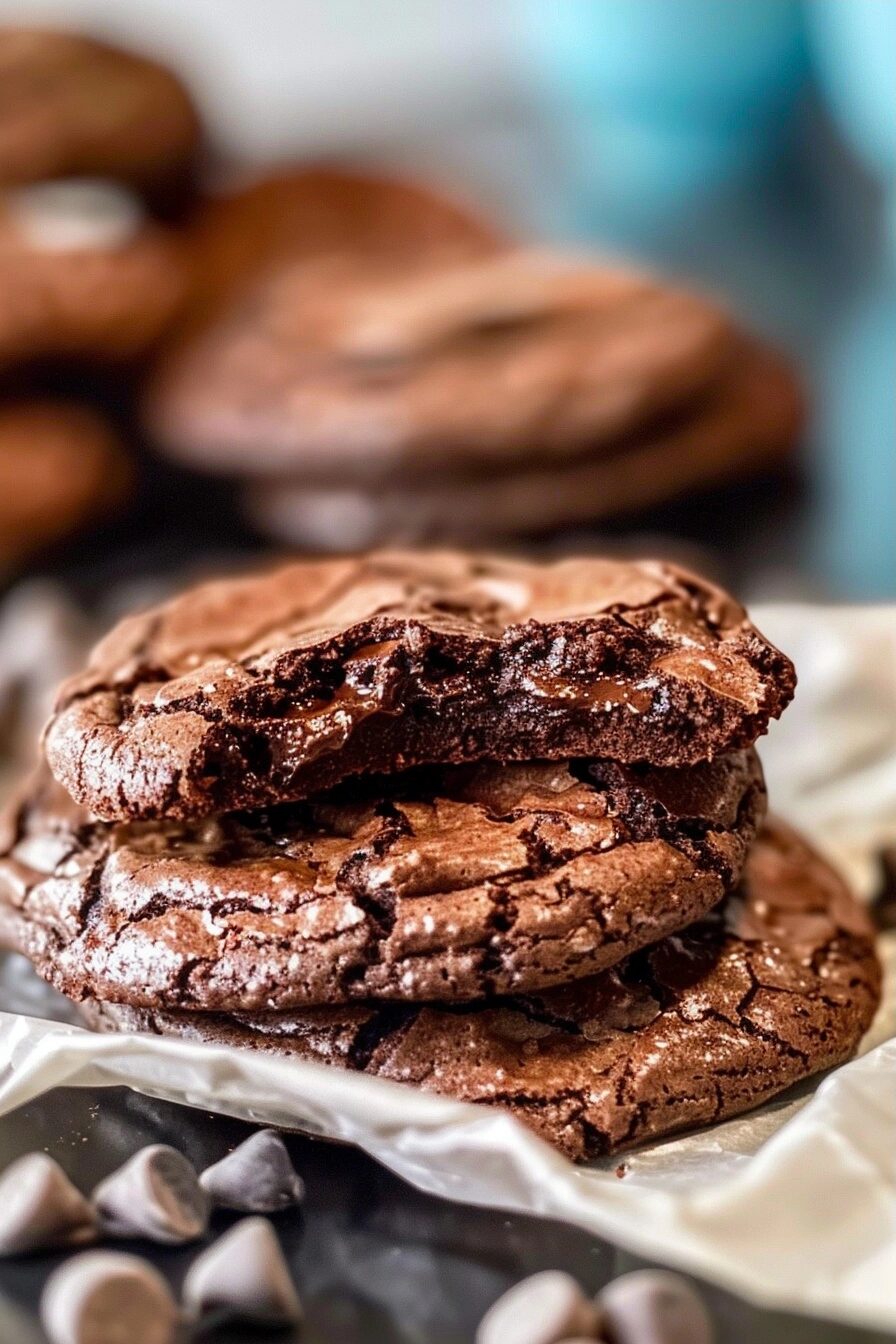
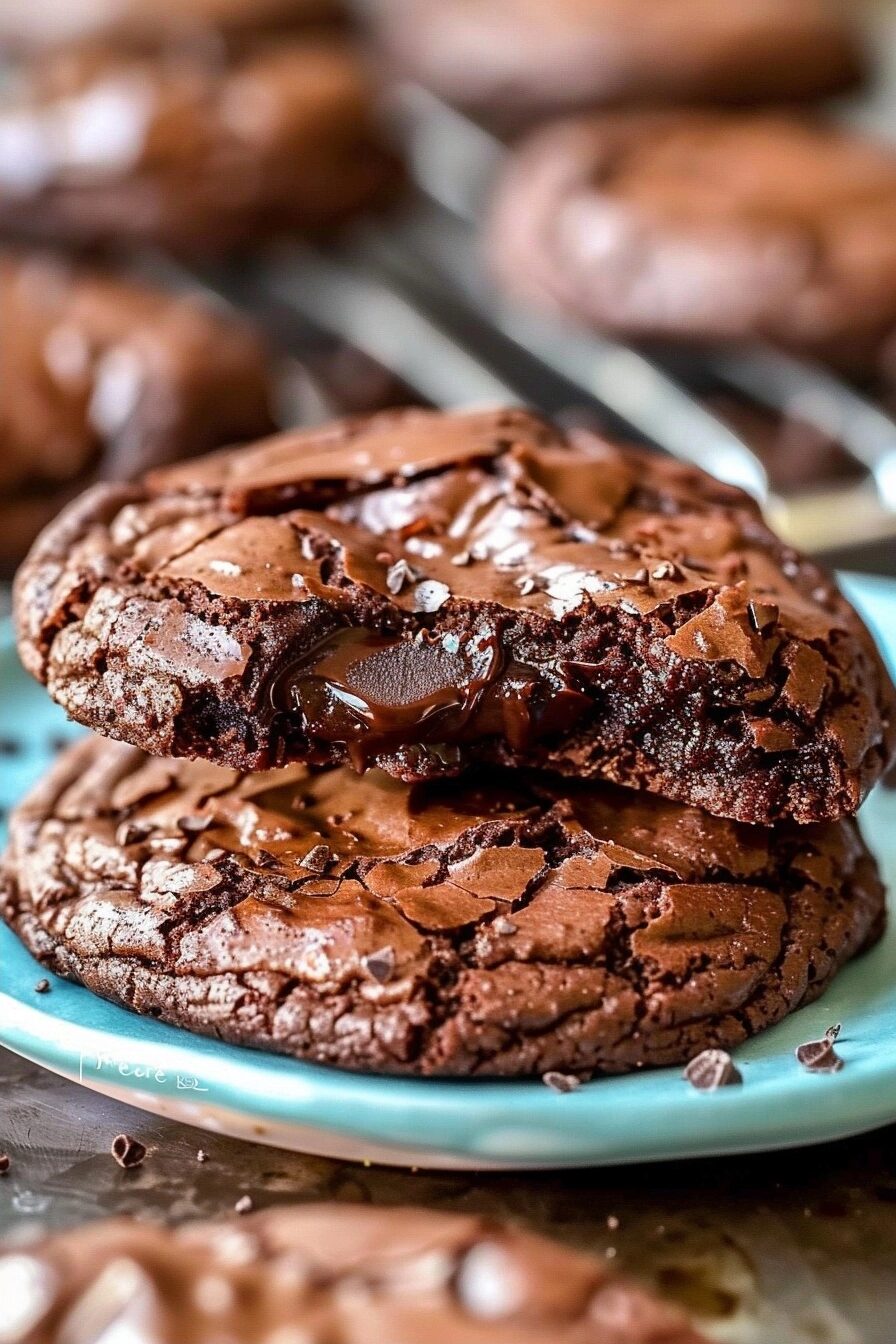
What sets these brownie cookies apart is their incredible texture. They boast a slightly crackly top, a wonderfully fudgy interior, and edges that provide just the right amount of chewiness. Unlike cakey cookies, these hold their structure while remaining incredibly moist and satisfying.
This recipe is wonderfully straightforward. Using common pantry ingredients, you can whip up a batch of these chocolate wonders in no time. They’re perfect for last-minute guests, a sweet afternoon pick-me-up, or simply when a serious chocolate emergency strikes.
Bringing a plate of these warm, chocolate-laden cookies to any gathering guarantees smiles. They also pair beautifully with a cold glass of milk or a steaming cup of coffee, making them a versatile treat for any occasion.
Ingredients of the Brownie Cookie Recipe
For the Brownie Cookies
- unsalted butter
- granulated sugar
- light brown sugar
- large eggs
- vanilla extract
- all-purpose flour
- unsweetened cocoa powder
- salt
- baking powder
- nutty chocolate chips (dark or semi-sweet recommended)
Optional Add-ins
- chopped nuts (like walnuts or pecans)
- more chocolate chips
- sea salt flakes for sprinkling
Equipment / Tools Needed
Saucepan or microwave-safe bowl
Whisk
Rubber spatula or wooden spoon
Large mixing bowl
Measuring cups and spoons
Baking sheets
Parchment paper or silicone baking mats
Wire cooling rack
Ice cream scoop or two spoons (for portioning)
Step-by-Step Instructions
Step 1: Melt the Butter
In a medium saucepan over low heat or in a microwave-safe bowl, melt the unsalted butter. Be careful not to burn it; you just want it smooth and liquid. Once melted, remove it from the heat and let it cool slightly for a few minutes. This step is crucial for achieving that signature fudgy texture.
Step 2: Combine Wet Ingredients and Sugars
Pour the slightly cooled melted butter into a large mixing bowl. Add the granulated sugar and light brown sugar. Whisk them together vigorously until the mixture is well combined and has a slightly glossy appearance. The sugars will start to dissolve into the butter, creating a rich base.
Step 3: Add Eggs and Vanilla
Add the large eggs one at a time to the sugar and butter mixture, whisking well after each addition. Ensure each egg is fully incorporated before adding the next. Stir in the vanilla extract. The mixture should look smooth and emulsified.
Step 4: Mix Dry Ingredients
In a separate medium bowl, whisk together the all-purpose flour, unsweetened cocoa powder, salt, and baking powder. Whisking these dry ingredients together ensures that the leavening agents and cocoa are evenly distributed throughout the flour, preventing pockets of bitterness or uneven rise.
Step 5: Combine Wet and Dry Mixtures
Gradually add the dry ingredient mixture to the wet ingredients. Using a rubber spatula or wooden spoon, gently fold the dry ingredients into the wet ingredients until just combined. Be careful not to overmix at this stage; a few streaks of flour are okay, as they will disappear during the final stir-ins. Overmixing can develop the gluten too much, leading to tougher cookies.
Step 6: Fold in Chocolate Chips
Add the nutty chocolate chips (or your preferred type) to the dough. Gently fold them into the batter until they are evenly distributed. If you’re adding any optional chopped nuts or extra chocolate chips, fold them in now as well. The dough will be thick and fudgy.
Step 7: Chill the Dough (Optional but Recommended)
For the best texture and to prevent excessive spreading, cover the bowl with plastic wrap and chill the dough in the refrigerator for at least 30 minutes, or up to 2 hours. Chilling allows the flour to hydrate and the fats to firm up, resulting in thicker, chewier cookies with more developed flavor.
Step 8: Preheat Oven and Prepare Baking Sheets
When ready to bake, preheat your oven to 350°F (175°C). Line two large baking sheets with parchment paper or silicone baking mats. This prevents sticking and makes for easy cleanup.
Step 9: Scoop the Dough
Using a cookie scoop (about 1.5 to 2 tablespoons per cookie) or two spoons, drop rounded balls of dough onto the prepared baking sheets, leaving about 2 inches of space between each cookie. If you chilled the dough, it will be easier to scoop. If you skipped chilling and the dough is sticky, lightly wet your hands or use a lightly greased scoop.
Step 10: Add Finishing Touches
If desired, sprinkle a few extra chocolate chips or a pinch of flaky sea salt on top of each cookie dough ball before baking. This provides a beautiful finish and an extra burst of flavor and texture.
Step 11: Bake the Cookies
Bake for 9-12 minutes. The edges should look set and slightly firm, while the centers will still appear slightly soft and underbaked. They will continue to cook and firm up as they cool on the baking sheet. Do not overbake if you want that fudgy center.
Step 12: Cool the Cookies
Let the cookies cool on the baking sheets for 5-10 minutes before carefully transferring them to a wire cooling rack to cool completely. This resting period on the hot baking sheet is essential for the cookies to set properly and achieve their chewy texture.
Tips & Tricks
Use Good Quality Cocoa: The chocolate flavor is paramount. Using a high-quality unsweetened cocoa powder will make a significant difference in the final taste and color of your brownie cookies.
Don’t Overmix: Mix the dry ingredients into the wet until *just* combined. Overmixing develops the gluten in the flour, which can lead to tougher, less tender cookies. A few streaks of flour remaining before adding the chocolate chips are perfectly fine.
Chill for Texture: While optional, chilling the dough for at least 30 minutes significantly improves the texture. It prevents the cookies from spreading too thin and concentrates the flavors, resulting in a chewier, fudgier cookie.
Watch the Baking Time: Brownie cookies can go from perfectly baked to overdone very quickly. Bake them until the edges are set and the centers look soft and still slightly underbaked. They will firm up as they cool, which is key to their fudgy texture.
Flaky Sea Salt is Your Friend: A sprinkle of flaky sea salt on top of the cookies before baking enhances the chocolate flavor and provides a delightful contrast to the sweetness. It’s a simple addition that makes a big impact.
Serving Suggestions
These brownie cookies are fantastic served warm, straight from the oven. They pair wonderfully with a tall glass of cold milk, making them a classic treat for kids and adults alike. For an extra decadent dessert, serve one slightly warmed with a scoop of vanilla bean ice cream on the side.
They also make a superb addition to any dessert platter or cookie assortment. Their rich chocolate flavor makes them a hit at parties, holidays, or potlucks. Enjoy them with a cup of coffee or tea for a satisfying afternoon indulgence.
Consider making a batch for a movie night at home; their intense flavor is perfect for cozying up with your favorite film. They are also a thoughtful homemade gift for friends and family.
Variations / Substitutions
Chocolate Variety: Feel free to experiment with different types of chocolate chips. White chocolate chips, milk chocolate chips, or even chunks of your favorite chocolate bar can be used. A mix of dark and milk chocolate chips is also delicious.
Nutty Crunch: For added texture and flavor, incorporate chopped nuts like walnuts, pecans, or almonds into the dough along with or instead of some of the chocolate chips. Toasting the nuts beforehand can deepen their flavor.
Spice it Up: A pinch of cinnamon or a touch of espresso powder added to the dry ingredients can offer a subtle depth of flavor that complements the chocolate beautifully.
Vegan Option: To make these vegan, you can experiment with using a flax egg (1 tablespoon flaxseed meal mixed with 3 tablespoons water, let sit for 5 minutes) or a commercial egg replacer. Ensure your chocolate chips are dairy-free.
Storage and Reheating
Once completely cooled, store the brownie cookies in an airtight container at room temperature. They are best consumed within 3-4 days. Adding a slice of bread to the container can help maintain their moisture and chewiness.
For longer storage, wrap individual cookies or small stacks tightly in plastic wrap and then place them in a freezer-safe bag or container. They can be frozen for up to 2-3 months. Thaw overnight at room temperature or gently warm them up.
To reheat, place a cookie on a microwave-safe plate and microwave on low power for 10-15 seconds, or until just warmed through. Alternatively, you can briefly warm them in a low oven (around 250°F/120°C) for a few minutes. Be careful not to over-warm, as this can dry them out.
Nutritional Info
Calories: ~220-250 kcal (per cookie, depending on size and add-ins)
Protein: ~3g
Carbohydrates: ~30g
Fat: ~12g
Conclusion
This brownie cookie recipe truly captures the essence of both beloved treats, offering a rich, fudgy interior and delightfully chewy exterior. They are a testament to simple ingredients creating something truly special and comforting.
Whether you’re a seasoned baker or just starting, these cookies are an excellent choice for guaranteed success and pure chocolatey indulgence. Enjoy the process and savor every delicious bite!
FAQ
How should I store leftover brownie cookies?
Store cooled brownie cookies in an airtight container at room temperature for up to 3-4 days. For longer storage, wrap them well and freeze for up to 2-3 months.
Can I substitute the type of chocolate chips?
Absolutely! Feel free to use milk chocolate, white chocolate, or even chunks of your favorite chocolate bar. A blend of different chocolates can also add complexity.
How should I serve these brownie cookies?
These cookies are best served at room temperature or slightly warm. They are perfect with a glass of milk, coffee, or tea, or even as a base for ice cream.
Can I make the dough ahead of time?
Yes, you can make the dough up to 2 days in advance. Store it tightly covered in the refrigerator. Chilling the dough for longer periods actually enhances the flavor and texture of the final cookie.
How do I ensure my brownie cookies are fudgy and not cakey?
To achieve a fudgy texture, avoid overmixing the batter and be careful not to overbake the cookies. They should look slightly underbaked in the center when you take them out of the oven; they will continue to set as they cool.

The Ultimate Brownie Cookie Recipe
Ingredients
- 1/2 cup unsalted butter
- 3/4 cup granulated sugar
- 1/2 cup light brown sugar, packed
- 2 large eggs
- 1 teaspoon vanilla extract
- 1/2 cup all-purpose flour
- 1/4 cup unsweetened cocoa powder
- 1/4 teaspoon salt
- 1/2 teaspoon baking powder
- 1 cup nutty chocolate chips (dark or semi-sweet recommended)
- Optional: chopped nuts (like walnuts or pecans), extra chocolate chips, sea salt flakes for sprinkling
Instructions
- Step 1: Melt the butter in a saucepan over low heat or in a microwave-safe bowl until just melted. Let cool slightly.
- Step 2: In a large mixing bowl, combine the slightly cooled butter with granulated sugar and light brown sugar. Whisk until well combined and glossy.
- Step 3: Add the eggs one at a time, whisking well after each addition. Stir in the vanilla extract.
- Step 4: In a separate bowl, whisk together the all-purpose flour, unsweetened cocoa powder, salt, and baking powder.
- Step 5: Gradually add the dry ingredients to the wet ingredients, mixing with a rubber spatula or wooden spoon until just combined. Do not overmix.
- Step 6: Fold in the chocolate chips and any optional add-ins like chopped nuts.
- Step 7: Cover the bowl and refrigerate the dough for at least 30 minutes (or up to 2 days) to firm up, which helps prevent spreading and enhances fudginess.
- Step 8: Preheat your oven to 350°F (175°C). Line baking sheets with parchment paper or silicone baking mats.
- Step 9: Scoop rounded portions of dough (using an ice cream scoop or two spoons) onto the prepared baking sheets, leaving about 2 inches between cookies.
- Step 10: Bake for 10-13 minutes, or until the edges are set and a toothpick inserted into the center comes out with moist crumbs attached (not wet batter).
- Step 11: If desired, sprinkle the tops with sea salt flakes immediately after removing from the oven.
- Step 12: Let the cookies cool on the baking sheets for a few minutes before transferring them to a wire cooling rack to cool completely.
Notes
Chilling the dough is essential for achieving the right texture and preventing the cookies from spreading too much.
Store cooled cookies in an airtight container at room temperature for up to 3 days.